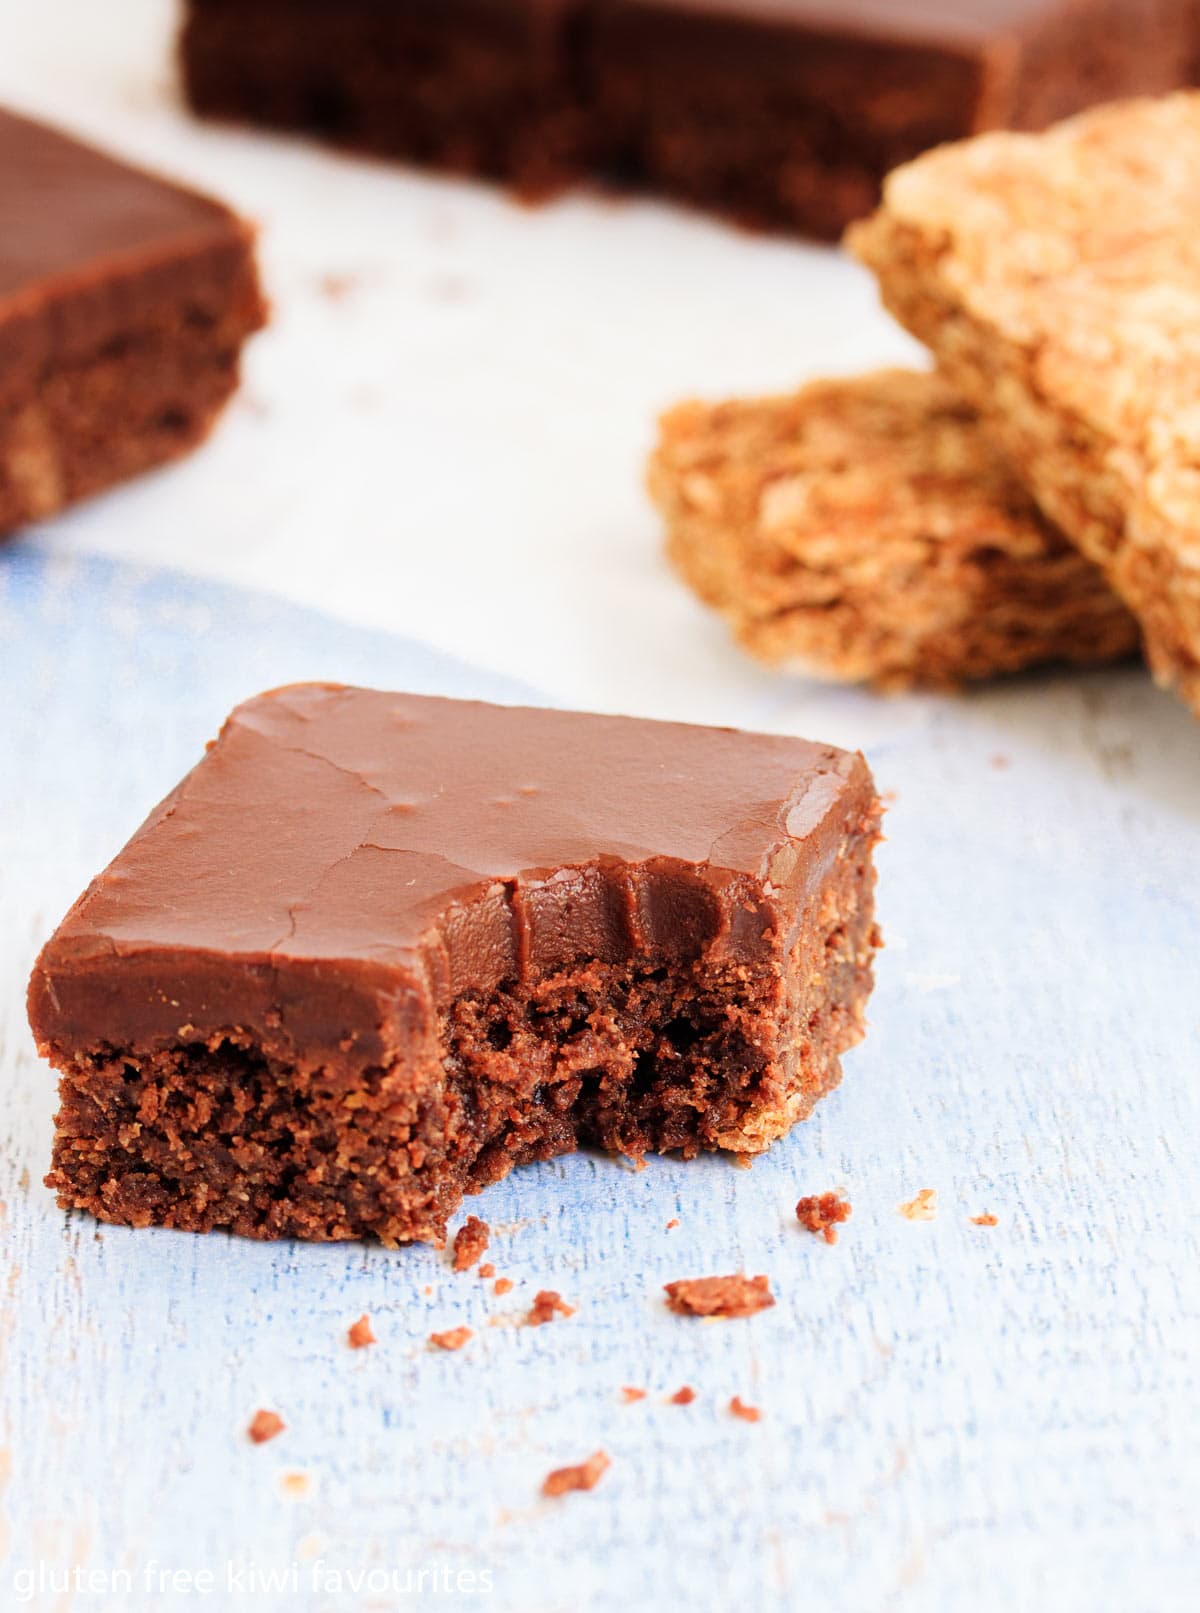
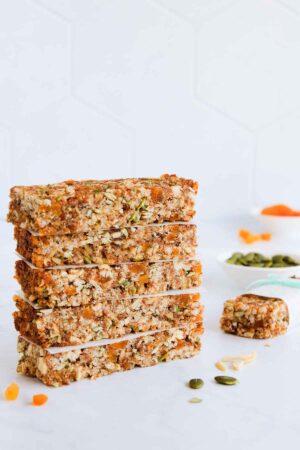
Gluten Free Weetbix Slice
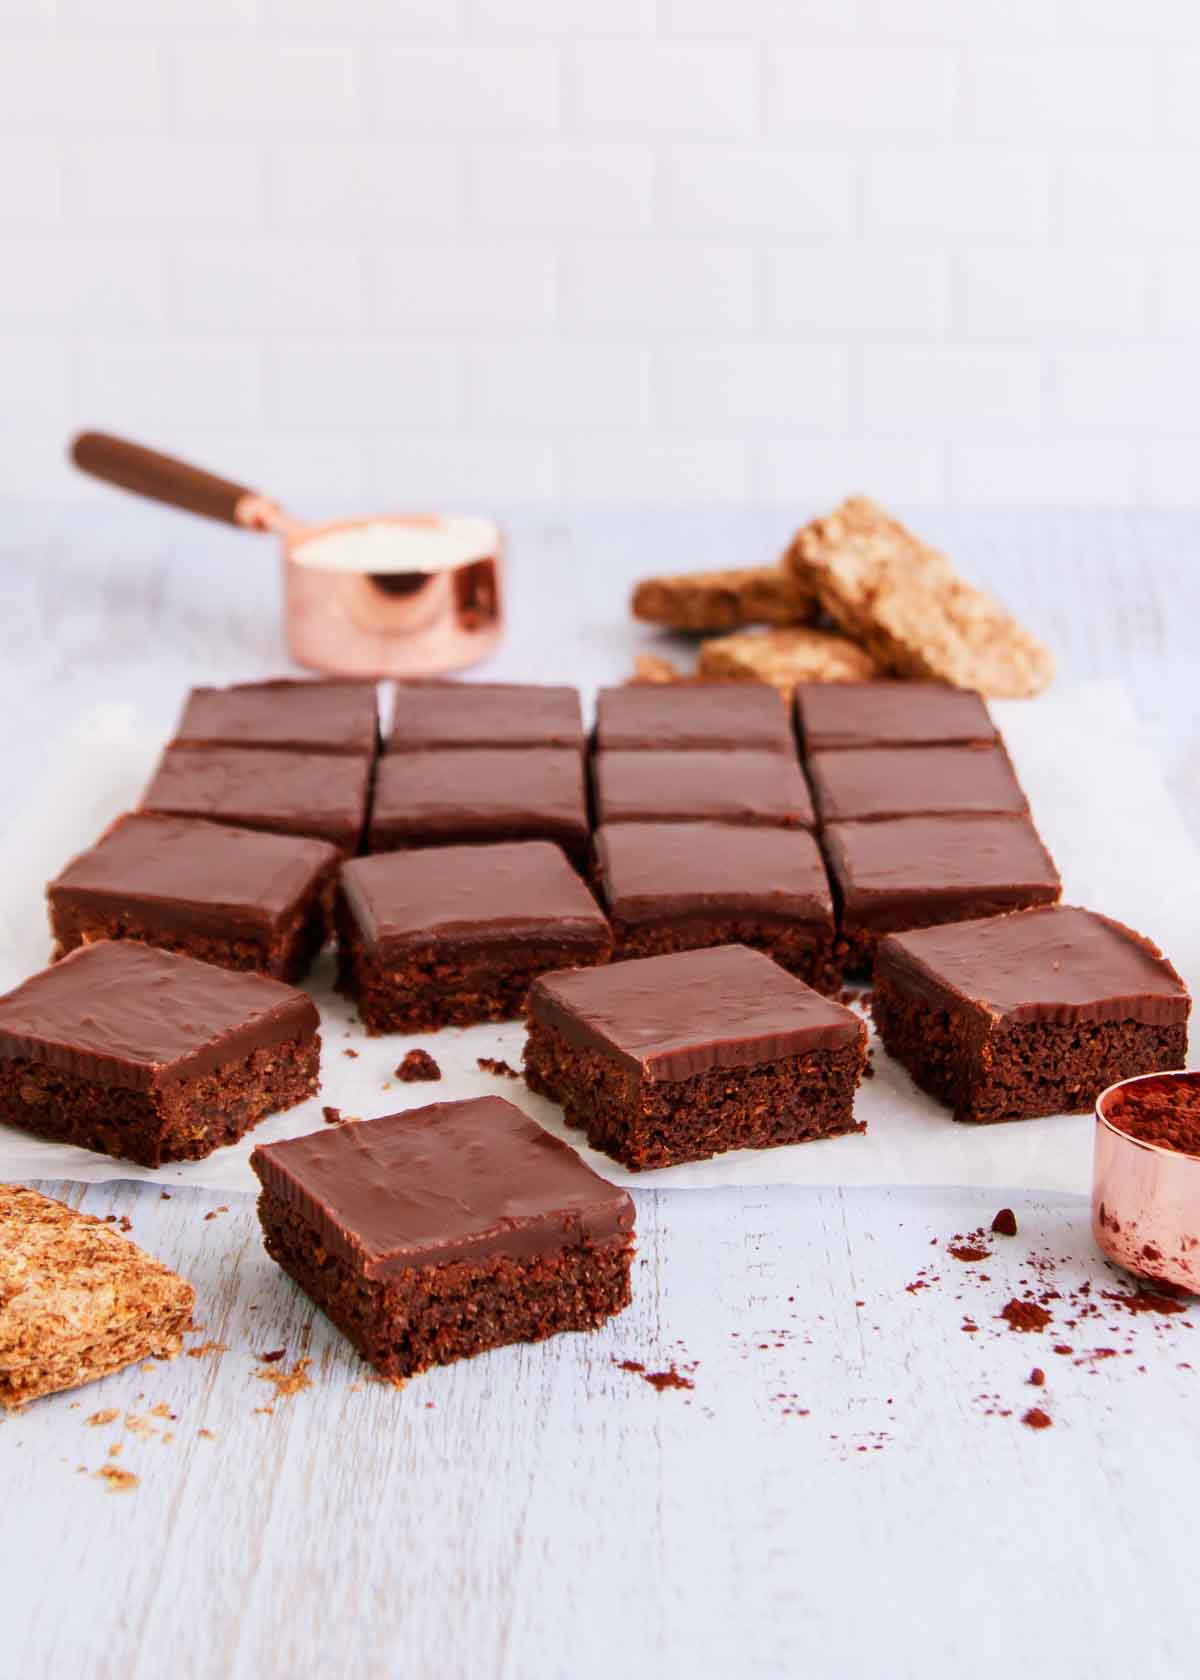
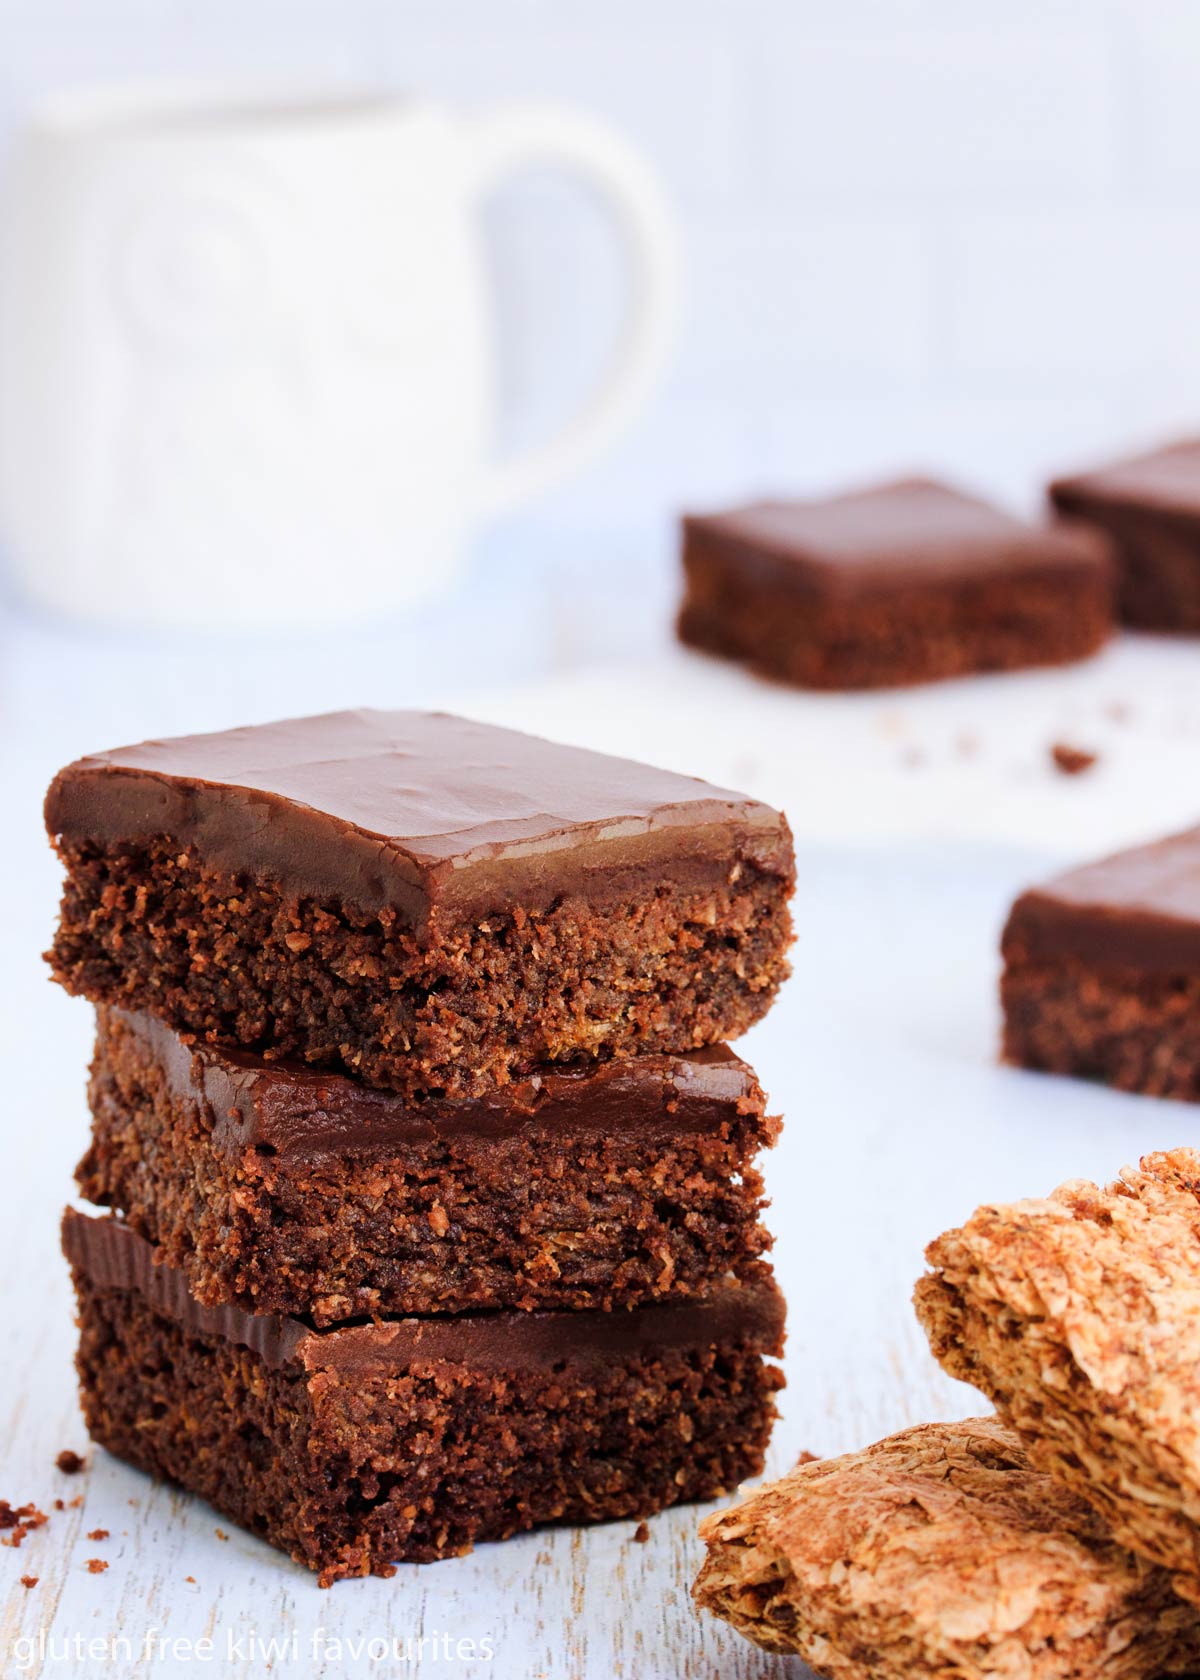
This gluten free weetbix slice is chewy and chocolatey, with crunchy crumbled pieces of gluten free Weet-bix and a smooth chocolate icing. An easy recipe that will be enjoyed by kids and adults alike.
As a Kiwi adult who grew up as a Kiwi child, can I admit that Weet-bix was never really a thing in our house? Despite the fact that they’re a common breakfast cereal in many New Zealand homes, I think I only remember ever having them once or twice maybe. And I possibly wouldn’t choose to eat them now.
But, I have to say, I would very happily demolish several pieces of this gluten free Weet-bix slice for breakfast afternoon tea, any day.
This is a super simple recipe to make, with a melt-and-mix base, and a basic chocolate icing.
It is also a really great recipe for kids to make, as aside from cutting up the butter the steps are safe for little hands to help with and the butter can be easily and safely melted in the microwave. The rest is just sifting, crumbling and stirring. Easy! Plus you’ll find step-by-step photos below.
And it’s sure to delight as an afternoon tea snack or gluten free lunchbox treat.
Let’s talk about how to make it.
Ingredients
Gluten Free Weet-Bix… Really?
Yes, really. Despite the fact that it still has “sweet” aka wheat in the name, gluten free Weetbix are made from sorghum, (which is a gluten free cereal) rather than wheat.
The texture is pretty similar, and you don’t notice any difference in taste in this slice. Like in a traditional weetbix slice, it just gives the base a slightly nutty flavour, and if you keep some of the crushed Weetbix pieces on the bigger side, they give the slice extra crunch.
Plus, while this isn’t exactly what you’d call a “healthy Weetbix slice”, the Weetbix will give you a little extra wholegrain fibre. Which is enough to convince me that it’s slightly better for me than some of my other favourite gluten free slice recipes, and eat a piece or two.
You can usually find the gluten free Weet-Bix either in the gluten free section of the supermarket or alongside the regular Weet-Bix in the cereal aisle.
To make the gluten free weet-bix slice, you’ll also need:
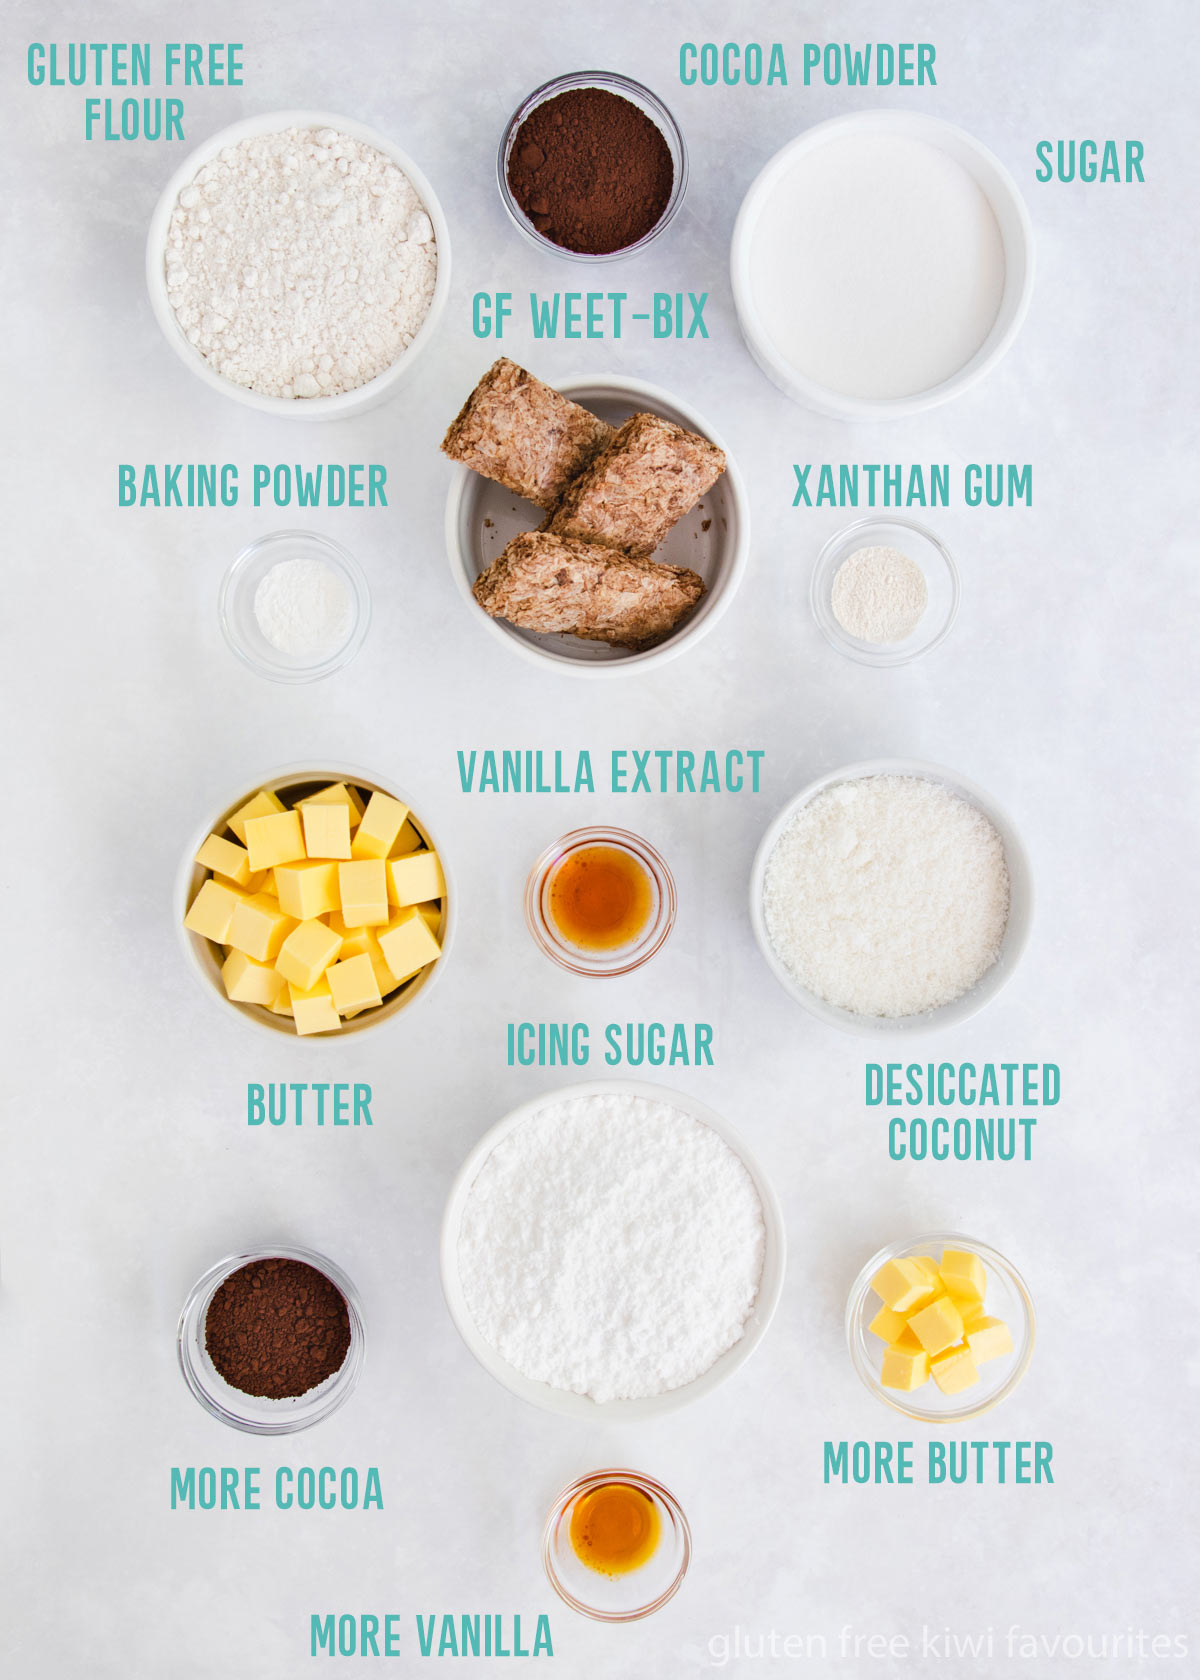
Gluten free flour – I used my homemade gluten free flour blend in this slice, but you can use a store-bought blend if you prefer, your slice texture may just be slightly different.
Cocoa – Any type of cocoa powder will work in this recipe. I used dutch-processed cocoa powder because that’s what I have on hand, but regular natural cocoa powder will work just the same.
Xanthan gum – This helps bind the slice base together. If you’re using a store-bought gf flour blend that already contains a gum ingredient (usually xanthan, guar or vegetable gum) then you can leave this out.
Baking powder – Make sure you check your baking powder is gluten-free (most are, but it pays to check).
Sugar – We’re using regular white sugar here, nothing fancy.
Desiccated coconut- If you’re not a fan of coconut, then you could try using ground almonds instead.
Butter – Either salted or unsalted butter will work fine here, I used salted. If you need to make this dairy free or vegan, use a dairy free or vegan butter alternative that is suitable for baking (it will say on the packet).
Vanilla – Not much to say here, I just like vanilla 🤷♀️ Vanilla extract is my choice, but vanilla essence will be fine too.
Icing sugar – This is for the icing, along with some more cocoa and butter, but we don’t need to talk about those twice.
How to Make Gluten Free Weetbix Slice
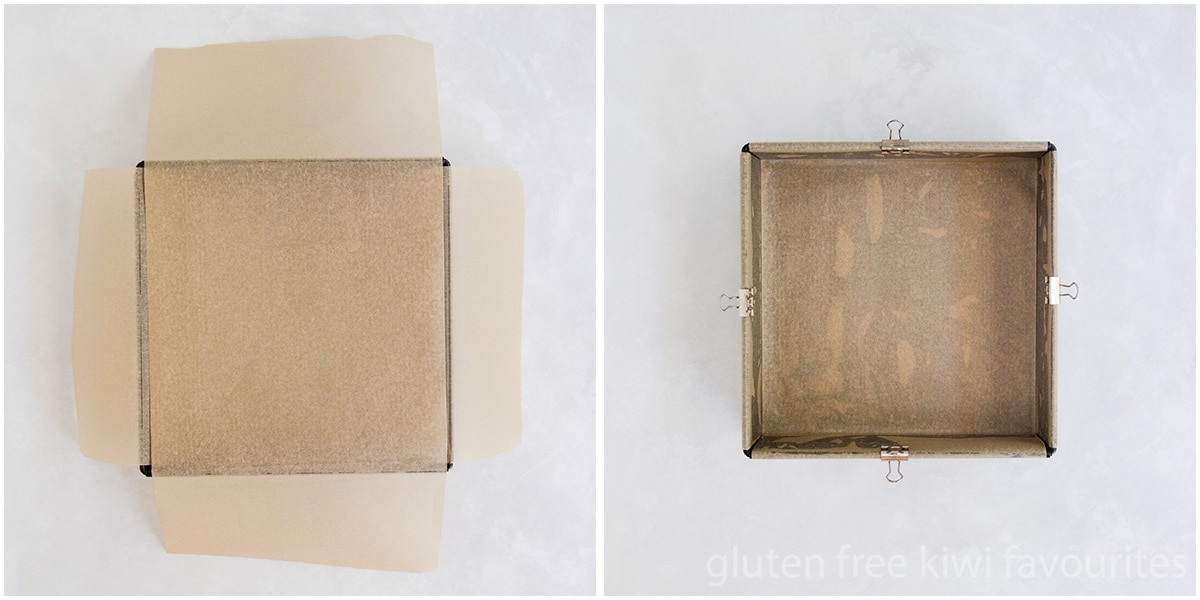
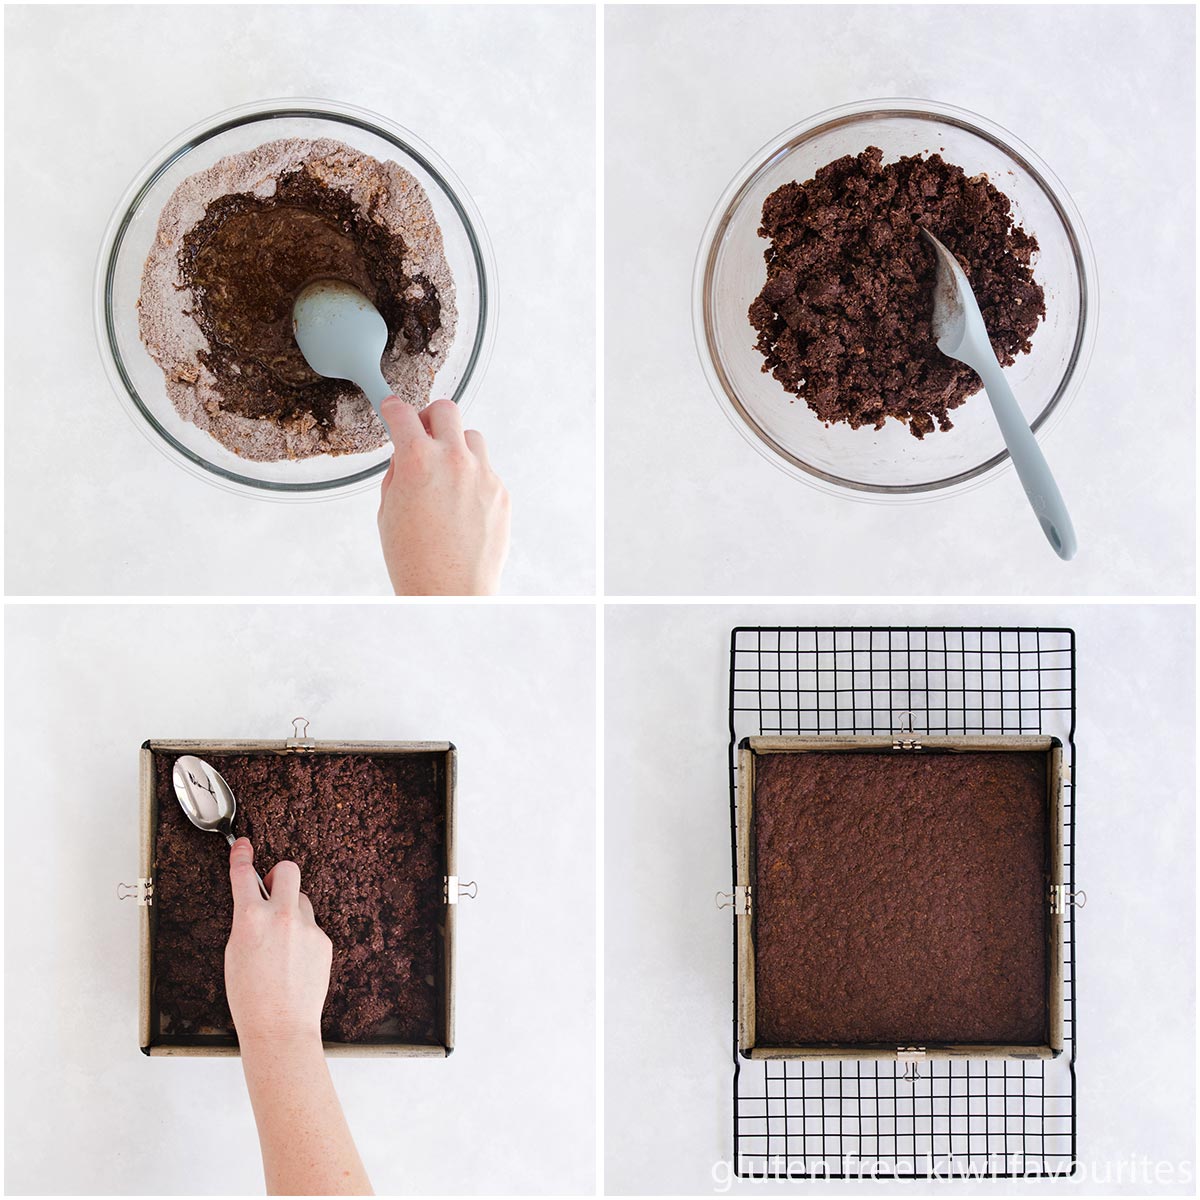
Start by spraying an 8″ (20cm) square cake tin (or roughly equivalent-sized slice tin ) with oil spray (or rub it with butter), and line it with two crisscrossed strips of baking paper. This gives you handy handles (yeah, I did say that) to remove the slice from the pan later. You can clip the edges down with bulldog clips if you like.
As mentioned above, the base is a melt-and-mix situation. The flour, xanthan gum, baking powder, and cocoa get sifted into a mixing bowl, then the sugar and coconut added and whisked all together. Next, crush in the gluten free Weetbix. Just do this by hand, leaving some bigger pieces for crunch.
(You could make this in a food processor if you wanted, but it’s really not necessary.)
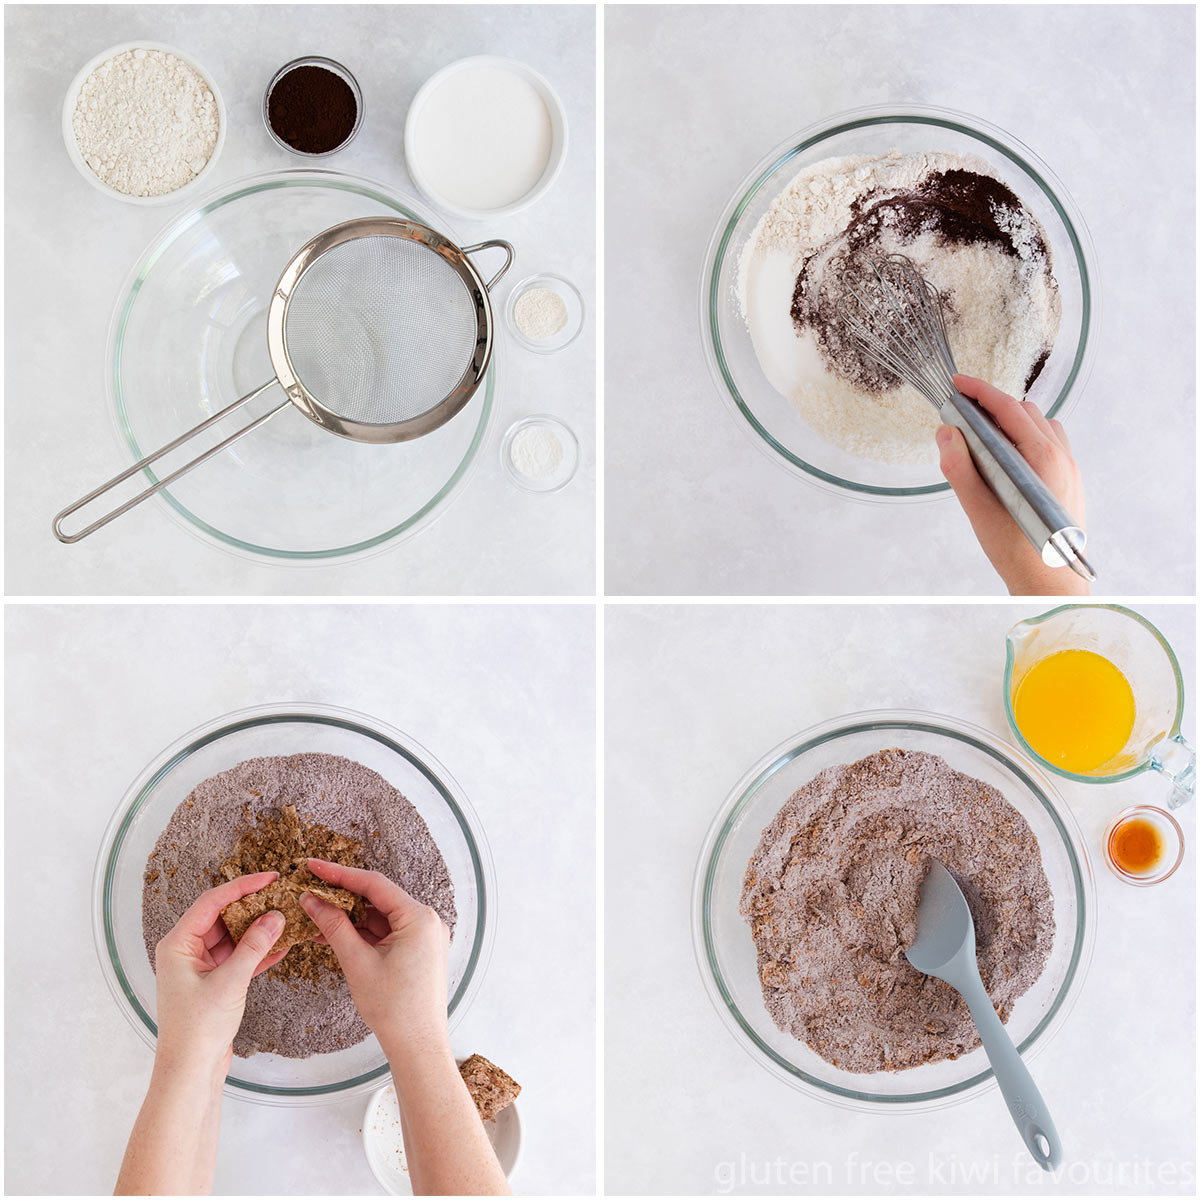
The butter gets melted in the microwave (or in a small saucepan over a low heat on the stove if you prefer), then it’s added to the dry ingredients along with the vanilla, and it all gets mixed until combined.
Press the mixture into the prepared tin, and spread it out evenly with the back of a spoon, a spatula or damp hands. Then it gets baked in a moderate oven and left to cool.
The icing is also an easy-mix job. Sift the icing sugar and cocoa into a bowl, then stir in the vanilla, melted butter, and enough hot water to make a smooth icing. Spread it onto the cooled base, and leave to set. This usually takes an hour or so, but you can speed it up by popping it in the fridge.
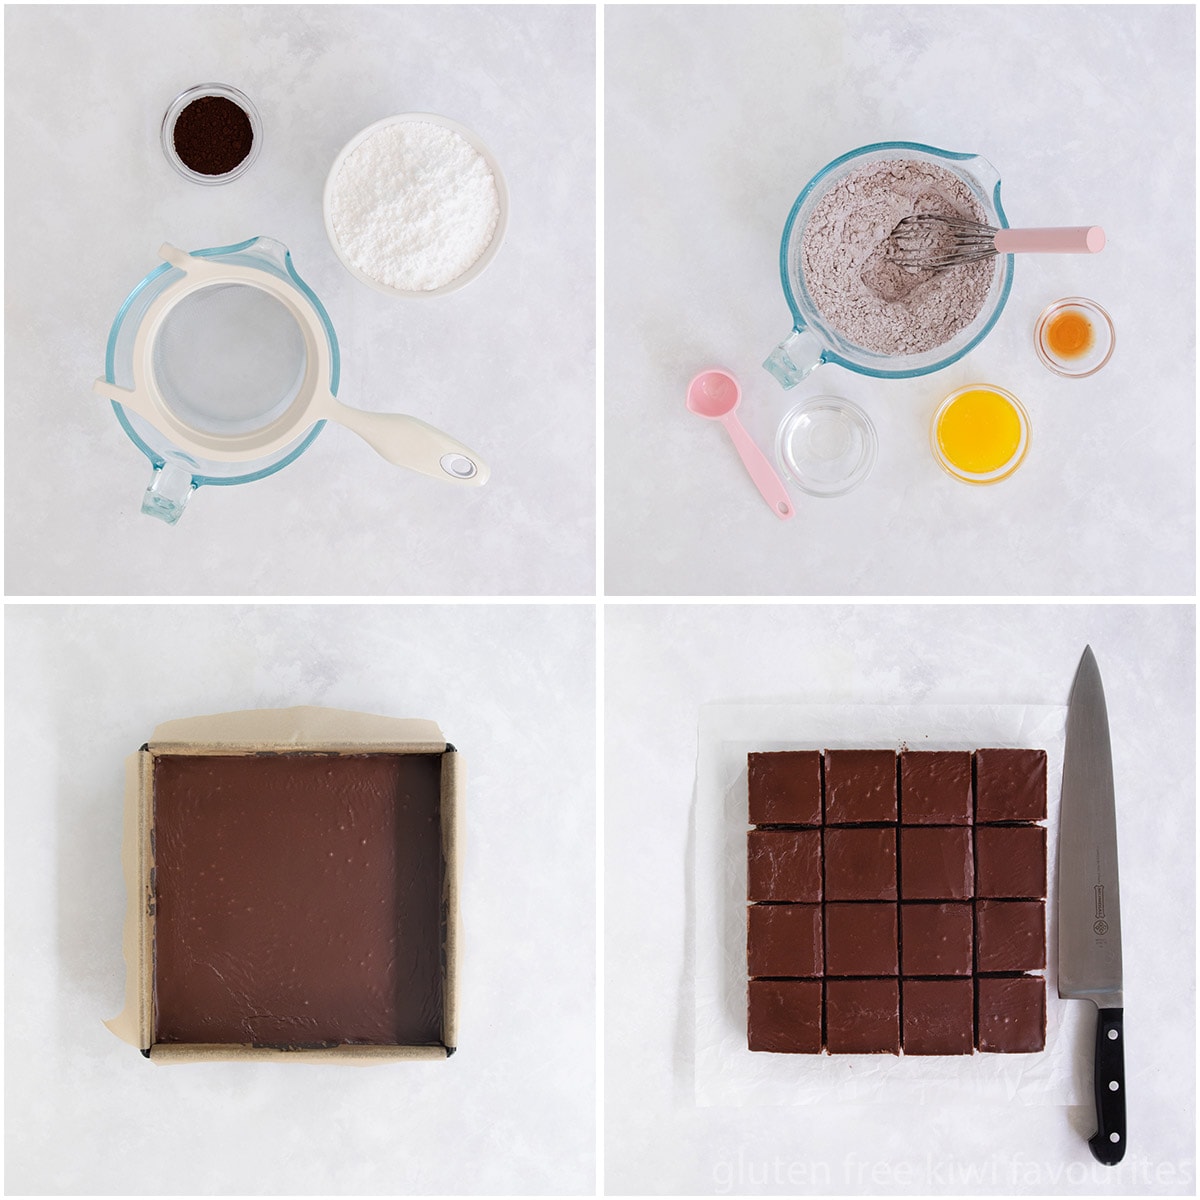
Slice it into pieces, and enjoy.
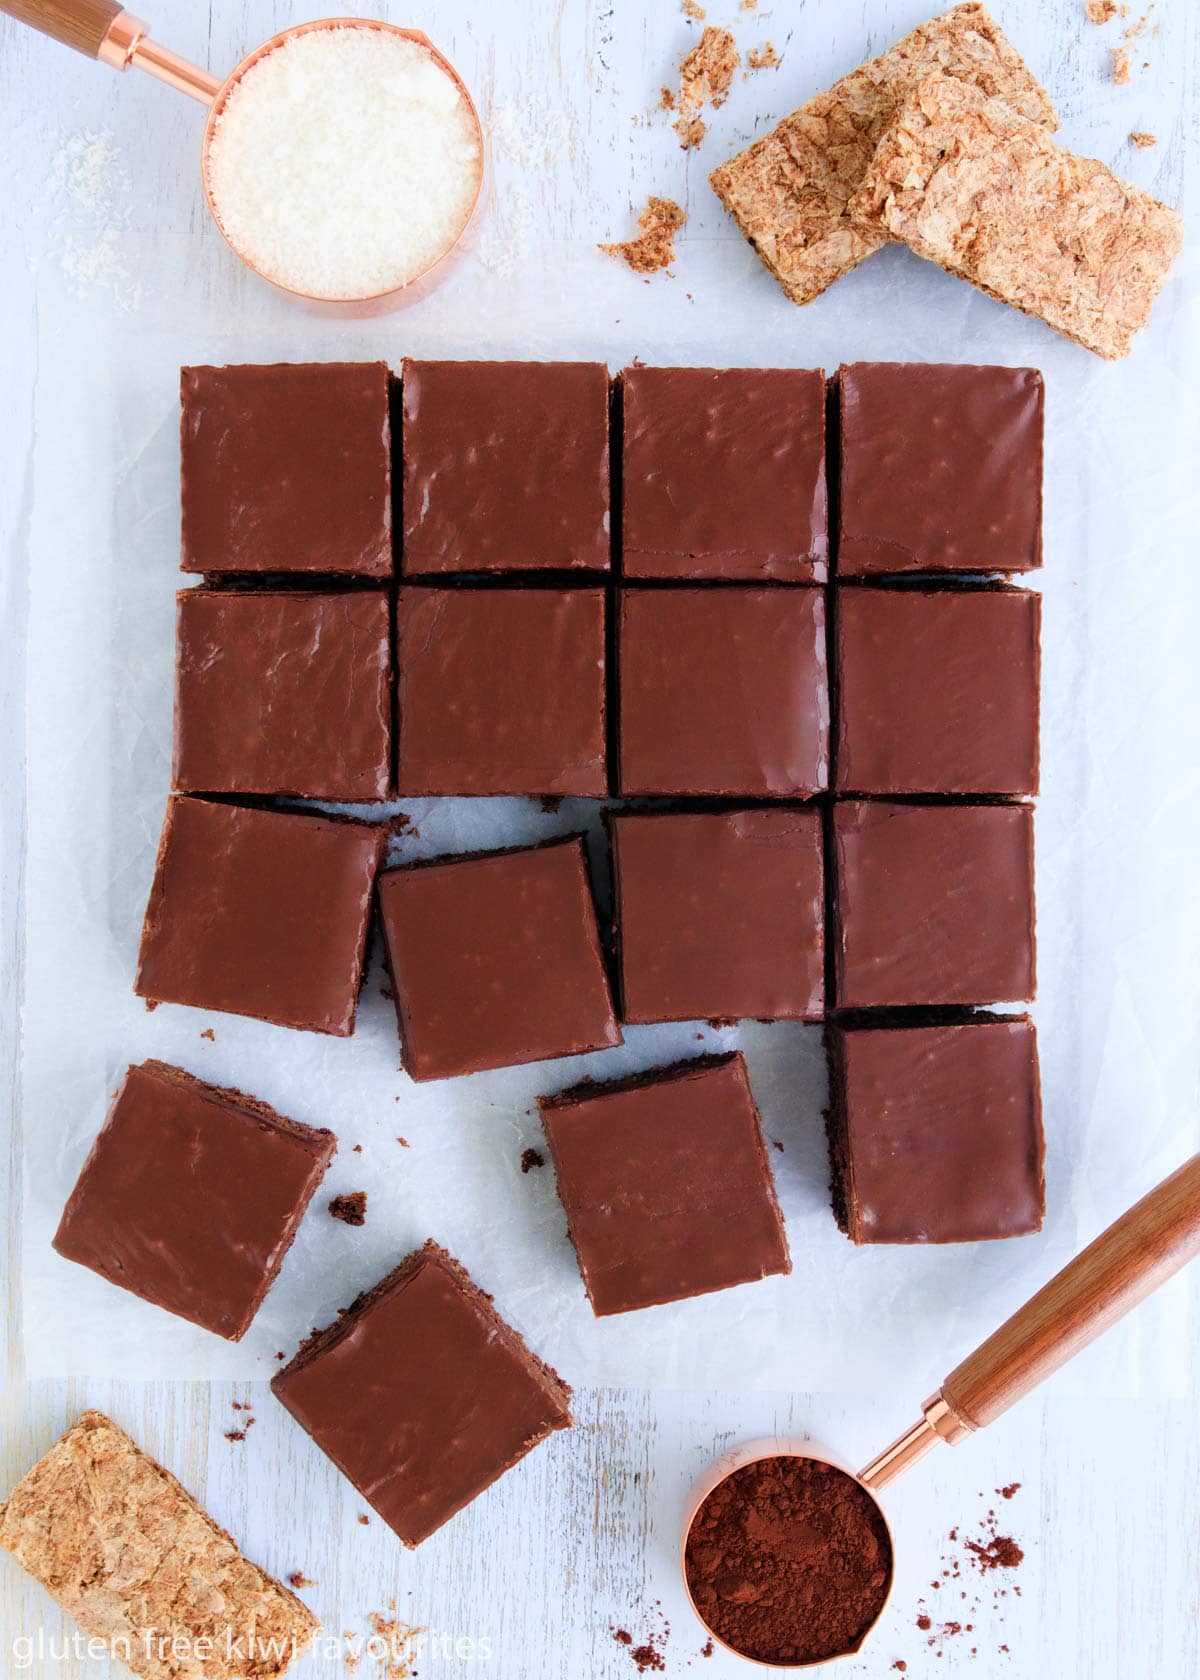
If I’d discovered a piece of this chocolate weetbix slice in my lunchbox as a school snack, I’d have been a very happy girl.
If you’re a fan of chocolate slice, you may also want to check out this gluten free chocolate no-bake slice, gluten free peppermint slice or gluten free rum balls.
Are you new to gluten-free baking?
Or just need some tips on how to make the most of the recipes on GFKF? Check out my start guide to learn how to bake safely and successfully gluten free.
Allergen safety ✔️ Gluten free flour info ✔️
Accurate measuring ✔️ Tools + Equipment ✔️


Gluten Free Weetbix Slice
Ingredients
For the Base
- 150 g gluten free flour
- 25 g cocoa powder
- 1 teaspoon baking powder
- 1 teaspoon xanthan gum
- 200 g sugar
- 80 g desiccated coconut
- 45 g gluten free weet-bix, (3 Weet-Bix)
- 175 g butter
- 2 teaspoons vanilla
For the icing
- 250 g icing sugar
- 2 tablespoons cocoa powder
- 1 teaspoon vanilla extract
- 25 g butter
Instructions
Make the base:
- Heat oven to 180℃.
- Spray an 8" (20cm) square cake tin with oil spray (or rub it with butter), and line it with two criss-crossed strips of baking paper, making sure it hangs over the edge slightly. We will use this to lift the slice out later.
- Sift the gluten free flour, cocoa powder, baking powder and xanthan gum into a large bowl. Add the sugar and coconut and whisk it all together to combine well.
- Crumble the gluten free weet-bix into the bowl. Aim to have some slightly larger chunks, if you want extra crunch in your slice. Mix it all together well.
- Melt the butter, and add it to the dry ingredients along with the vanilla extract. Mix until well combined.
- Press the mixture into the prepared pan and smooth into an even layer with the back of a spoon or spatula.
- Bake for 15-20 minutes, or until evenly risen and set. Depending on your oven, 15 minutes should give you a chewy slice, and 20 minutes will give you a crunchier slice. Allow it to cool before icing.
Make the icing:
- Sift the icing sugar and cocoa together into a medium sized bowl and whisk to combine.
- Melt the butter, and add it, along with the vanilla, to the icing sugar mixture.
- Add 2 tablespoons of warm water, and mix. Add more water, a teaspoon at a time, until the icing is smooth and spreadable.
- Spread the icing over the cooled base, and allow to set. You can speed this up by popping it in the fridge.
- Cut the slice into squares using a large sharp knife.
- Store the weet-bix slice in an airtight container.
Notes
Other easy slice recipes you may like:
This is a weekly staple in our household! I’ve cut the sugar down to 100gm and halve the icing quantities to make myself feel better about using it to fill their lunchboxes everyday. Kids love it!
Looks easy, cant wait to try it. Do these freeze?
Hi Elisa, I haven’t tried freezing these, but I think as long as they’re frozen in an airtight container or snaplock bag, they should be fine. There’s a chance the icing could get a little sticky, but it should dry out once they’ve thawed. Maybe just try freezing a couple of pieces the first time you make it and see how they go 🙂 Hope that helps, and I hope you enjoy it! 💜
I made this slice for my colleagues and everyone loved it. I heard more disappointed “oh, it’s it all gone” than I’ve ever heard! Highly recommend this recipe
Hi Tania, thanks so much for this comment, I love it so much. I’m really glad you and your colleagues enjoyed the slice! 💜
I was adamant this recipe would come out a crumbly mess, but it really didn’t. It holds up really well and tastes great! I converted this into a chocolate peppermint slice and my whole family love it! Thank you gfkf!!
Really good recipe! Tastes just like the original version. Great for lunches.
Can I use oil instead of butter thanks
Hi Kaza, I wouldn’t recommend switching the butter for oil in this recipe, as oil is liquid and won’t work the same as butter. Butter also contains some water, which oil doesn’t. If you want to make it dairy free, you could use a dairy free butter alternative, anything that comes in a block and says it’s suitable for baking should work 😊
Love it😍😍😍😍😍