Gluten Free Pinwheels (Savoury Scrolls)
Gluten free pinwheels are a delicious and filling lunch or snack. They are super easy to make and you can fill these savoury scrolls with your own favourite fillings. Turn them into pizza pinwheels or even cheesymite scrolls.

As someone with not just one sweet tooth but a whole mouthful, I often don’t even think to do savoury baking, but these gluten free pinwheels are something that I make often for lunch. It’s based on my Nonna’s easy scone recipe, and the pinwheel scones my Mum has made for years.
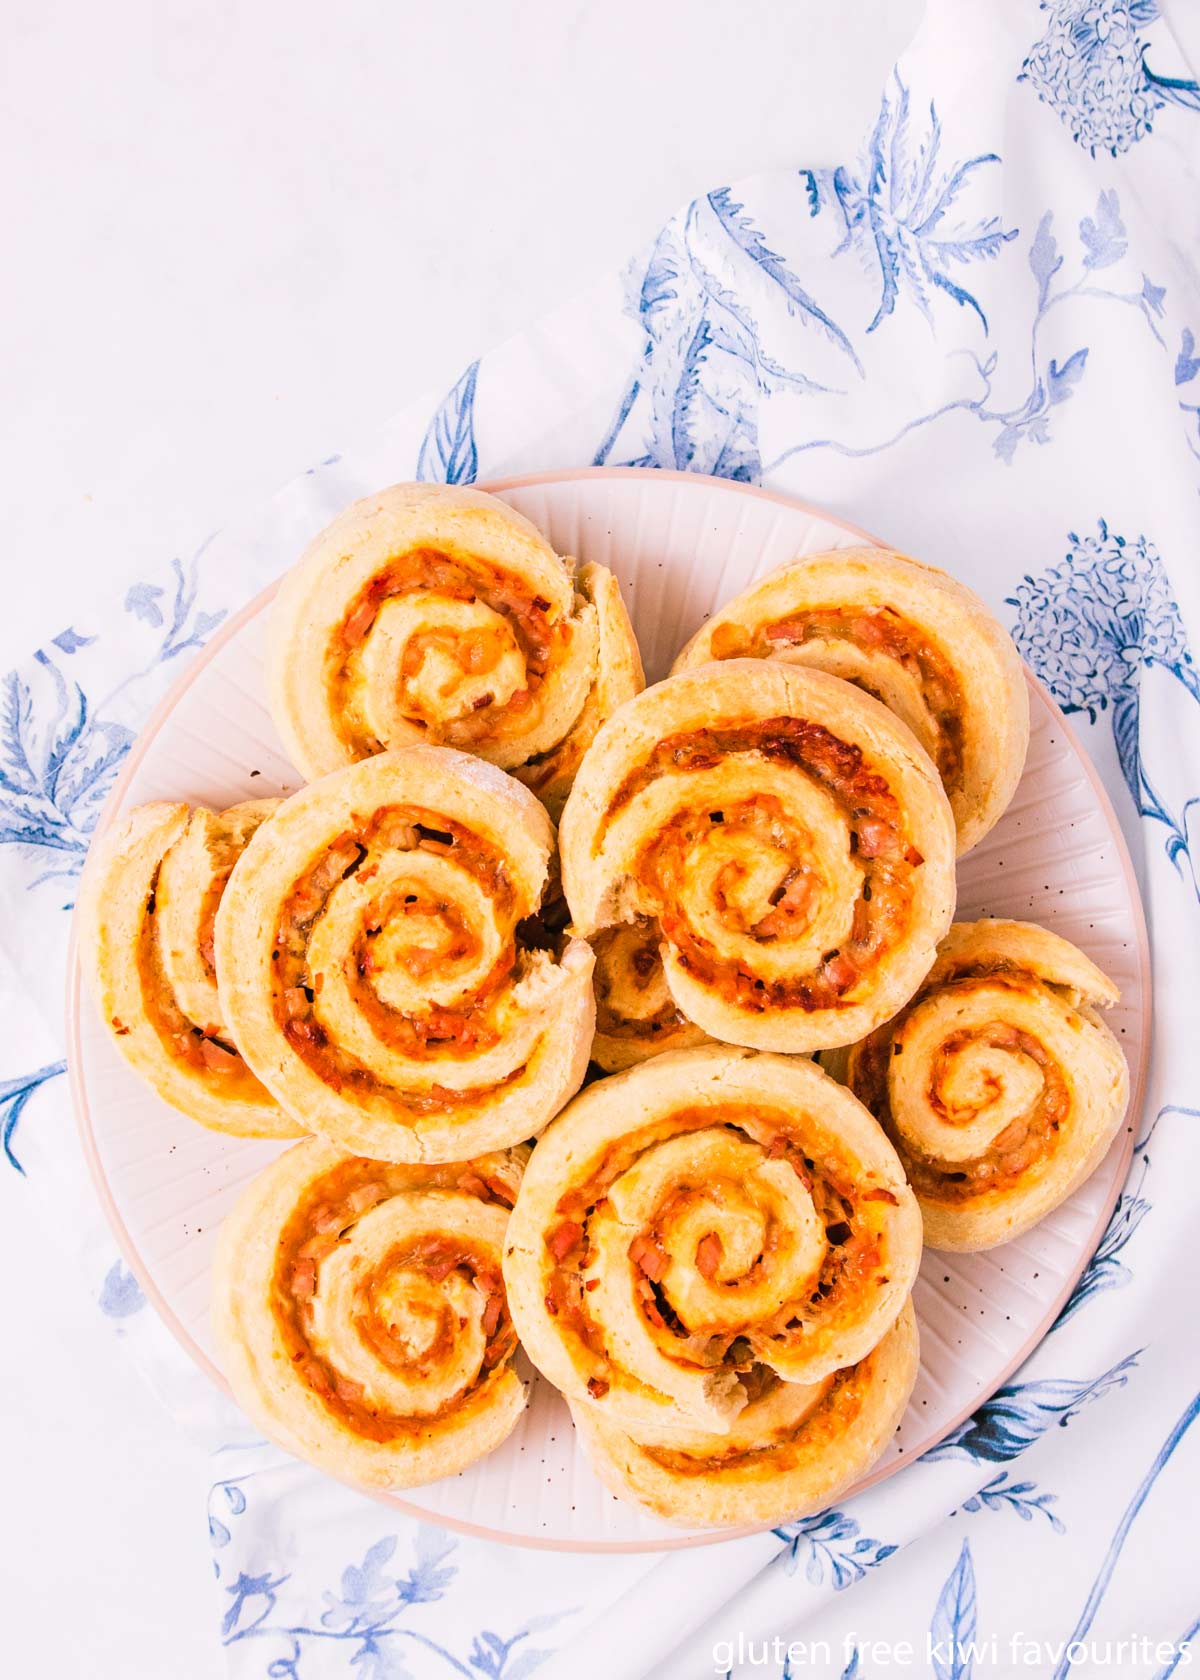
Pinwheels or savoury scrolls are made with a dough that is rolled out, spread with sauce (or other flavouring) and sprinkled with cheese and other toppings, then rolled up and sliced before baking.
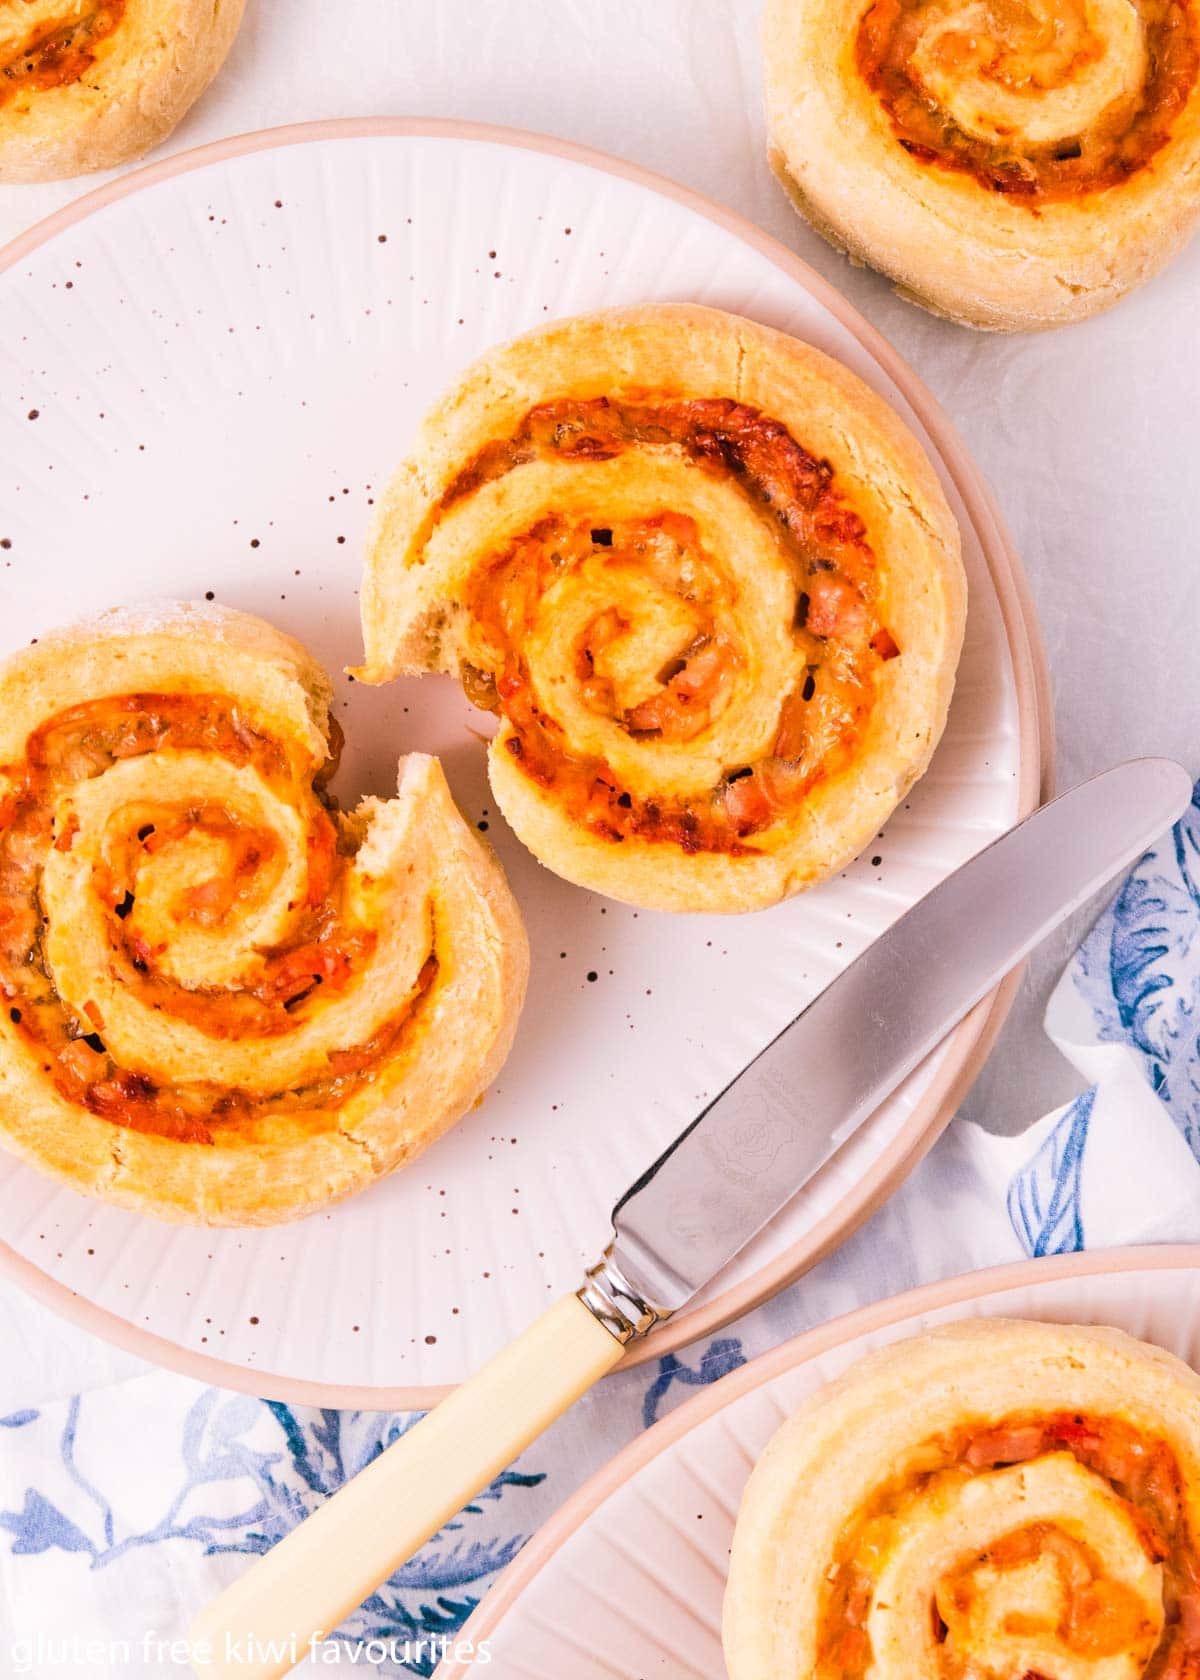
You get these delicious little (or big, depending on how you cut them) scones swirled with melty cheese.
The dough for this is super easy to make, a real mix-it-and-go situation, and you can fill it with any of your favourite toppings. I have gone with ham and cheese here, but I will give you some ideas below for other things you can fill them with.
Ingredients
Gluten Free pinwheel Dough
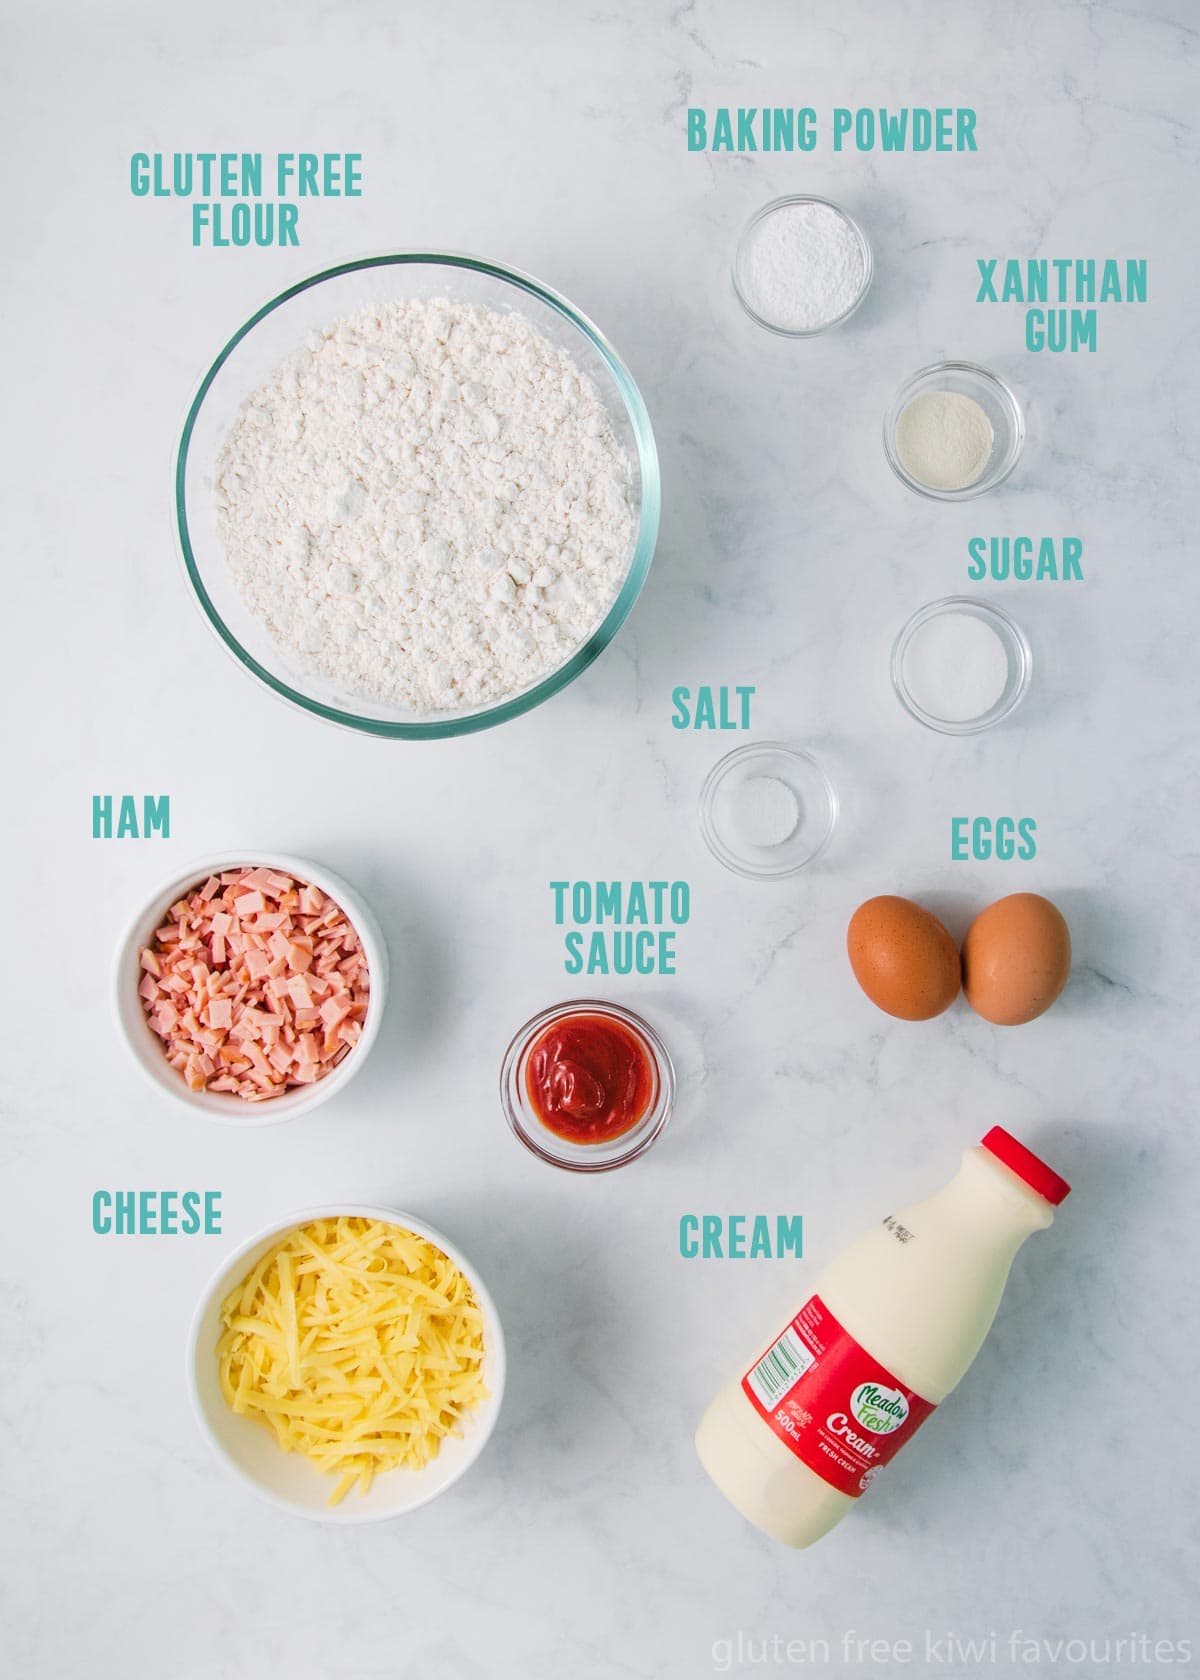
Gluten free flour – I always make these using my homemade gluten free flour blend, and I haven’t yet tested them with any supermarket flour blends. I will update the post when I have, but if you try it in the meantime with a different flour, I’d love for you to let me know how it went!
Xanthan gum – This helps to stop the dough from crumbling, you can read more about xanthan gum here. If using a premade blend that contains a gum ingredient (it will say in the ingredient list) then you can omit the xanthan gum.
Baking powder – Make sure you check that your baking powder is gluten free, as some (like Pams) are not. Edmonds and Hansells are generally safe, but always check the ingredients on the box/container when you buy it.
Salt – Regular table salt or flaky sea salt are both fine here.
Sugar – I like to add a small amount of sugar to the dough even for savoury scrolls as it gives it a bit more flavour, but it is absolutely optional and you can leave it out if you prefer.
Cream – This recipe doesn’t use butter, so the cream provides the fat content. Use regular whipping cream, or if you like to be prepared for sudden scroll cravings, you can keep a couple of little cartons of UHT (long-life) cream in the pantry for when the need strikes, and that works well here too.
Eggs – You’ll need large eggs for this recipe.
Black pepper – I add some extra salt and some pepper on top of the sauce for flavour, but you can leave them out or substitute them with herbs or spices.
Fillings
I have made gluten free ham and cheese scrolls here, and the ingredients below and in the recipe card are what I used, but you can use any fillings that you like. Keep reading for other scroll-filling ideas.
Sauce – I used a combination of good old tomato sauce and ketchup, but you can use one or the other, another kind of sauce like barbecue sauce, or use tomato paste or puree instead. Instead of sauce, you could use your favourite relish or chutney instead.
Cheese – Another combo – I like to use half tasty cheese (for flavour) and half Edam (for melty-ness) but you can use any cheese you like. If you buy pre-grated cheese, make sure you check the ingredients and make sure it’s gluten free, as sometimes the ingredients used to stop the cheese clumping contain gluten.
Ham – Any ham will work – sliced, shaved, leftover Christmas ham, if it’s ham you can use it. If you don’t want to use ham you can use any other kind of deli meat that you like.
Other Pinwheel Filling Ideas
How to Make Gluten Free Pinwheels
Start by preparing your filling ingredients. Grate your cheese (if you’re not using pre-grated cheese) and chop your other fillings into ~1cm pieces. The smaller they are, the easier it will be to roll the dough up, and the more likely you are to have a piece of everything in every bite.
To mix the dough you’re going to need a big old bowl to avoid making a mess, so grab that and throw in (ok, don’t throw it, we’re trying not to make a mess… yet) your gluten free flour, xanthan gum, baking powder and sugar and give it a good whisk to combine everything really well and get that baking powder well distributed. If any of your ingredients are clumpy, by all means, sift them first.
Next, measure your cream into a jug or bowl, crack in the eggs and give it all a good whisk with a fork.
Pour most of the cream and egg mixture into the dry ingredients, and mix together with a large spoon or stiff spatula. The dough should be soft but not wet. If it’s too dry, add a little more of the cream/egg (or if you run out of that, a bit more cream or some milk or water) a tablespoon at a time until it comes together. If it’s too wet, add a little sprinkle of extra flour.

Because different gluten free flours absorb liquid differently, you may need to tweak the recipe to suit the flour you use. I suggest you write down what flour you use and any tweaks you make, so you’ll know for next time.
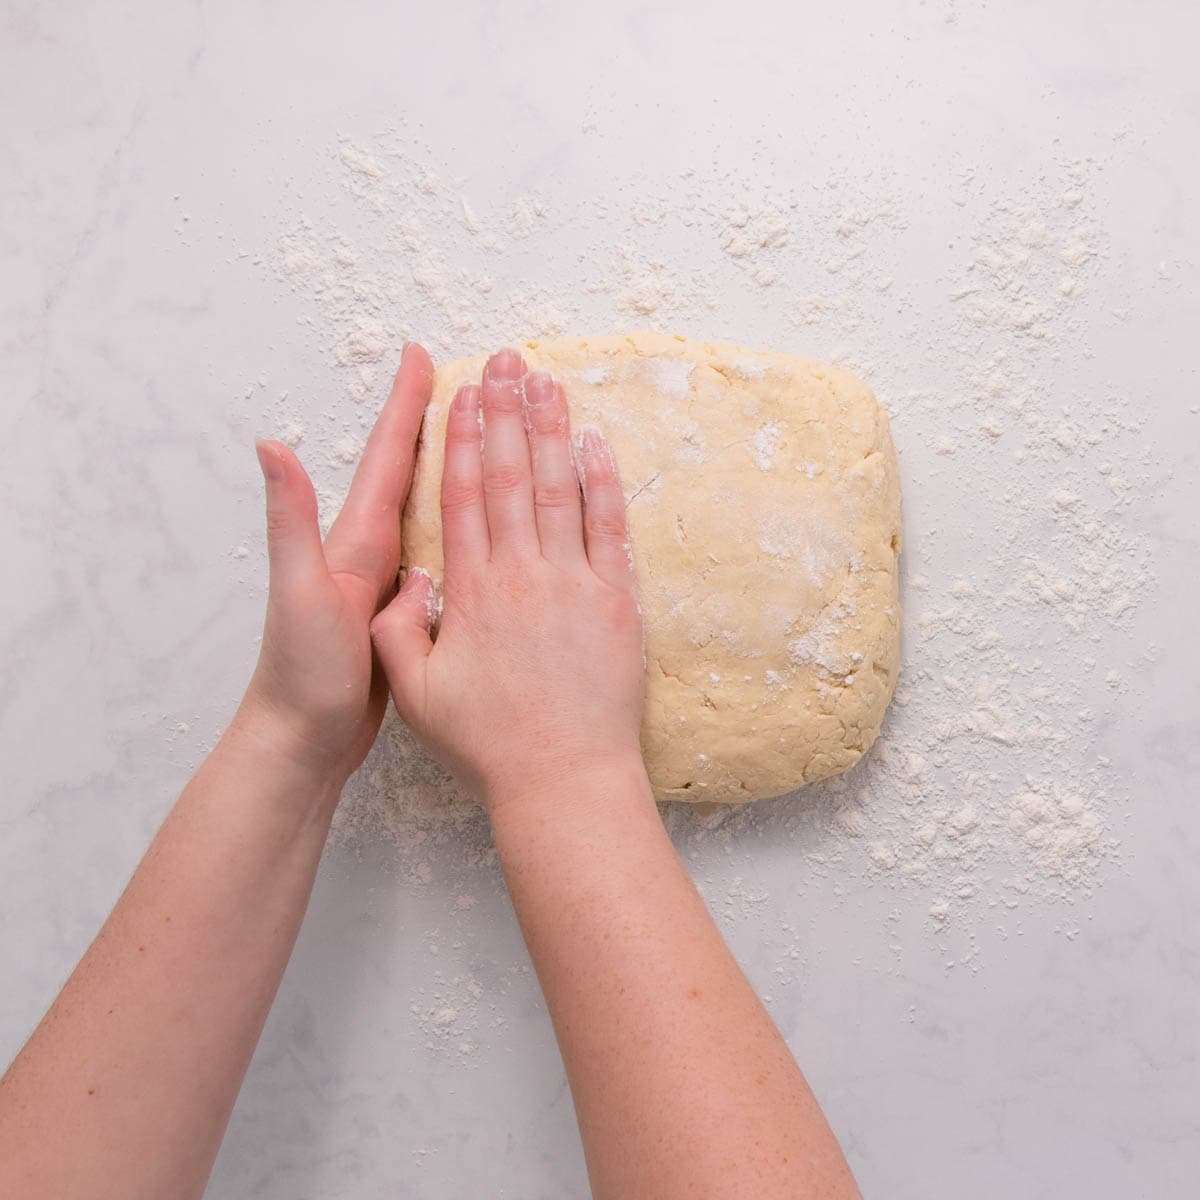
Tip the dough out onto the bench and give it a gentle knead, just until it comes together. It should look a little scraggly, but as long as it holds together, it’s fine. Pat the dough into a roughly square shape.
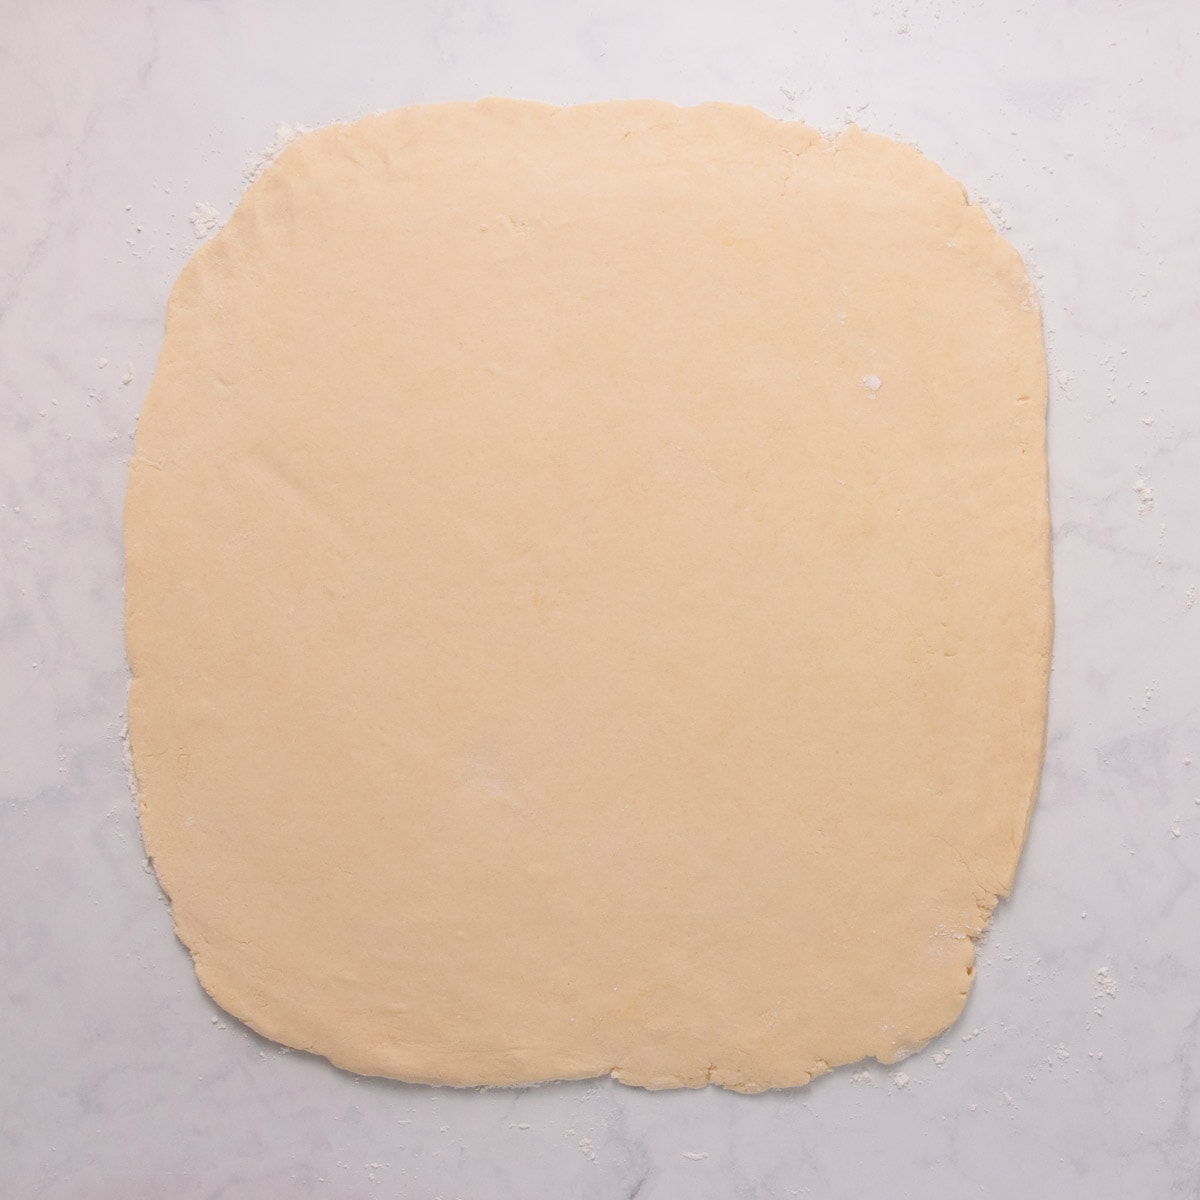
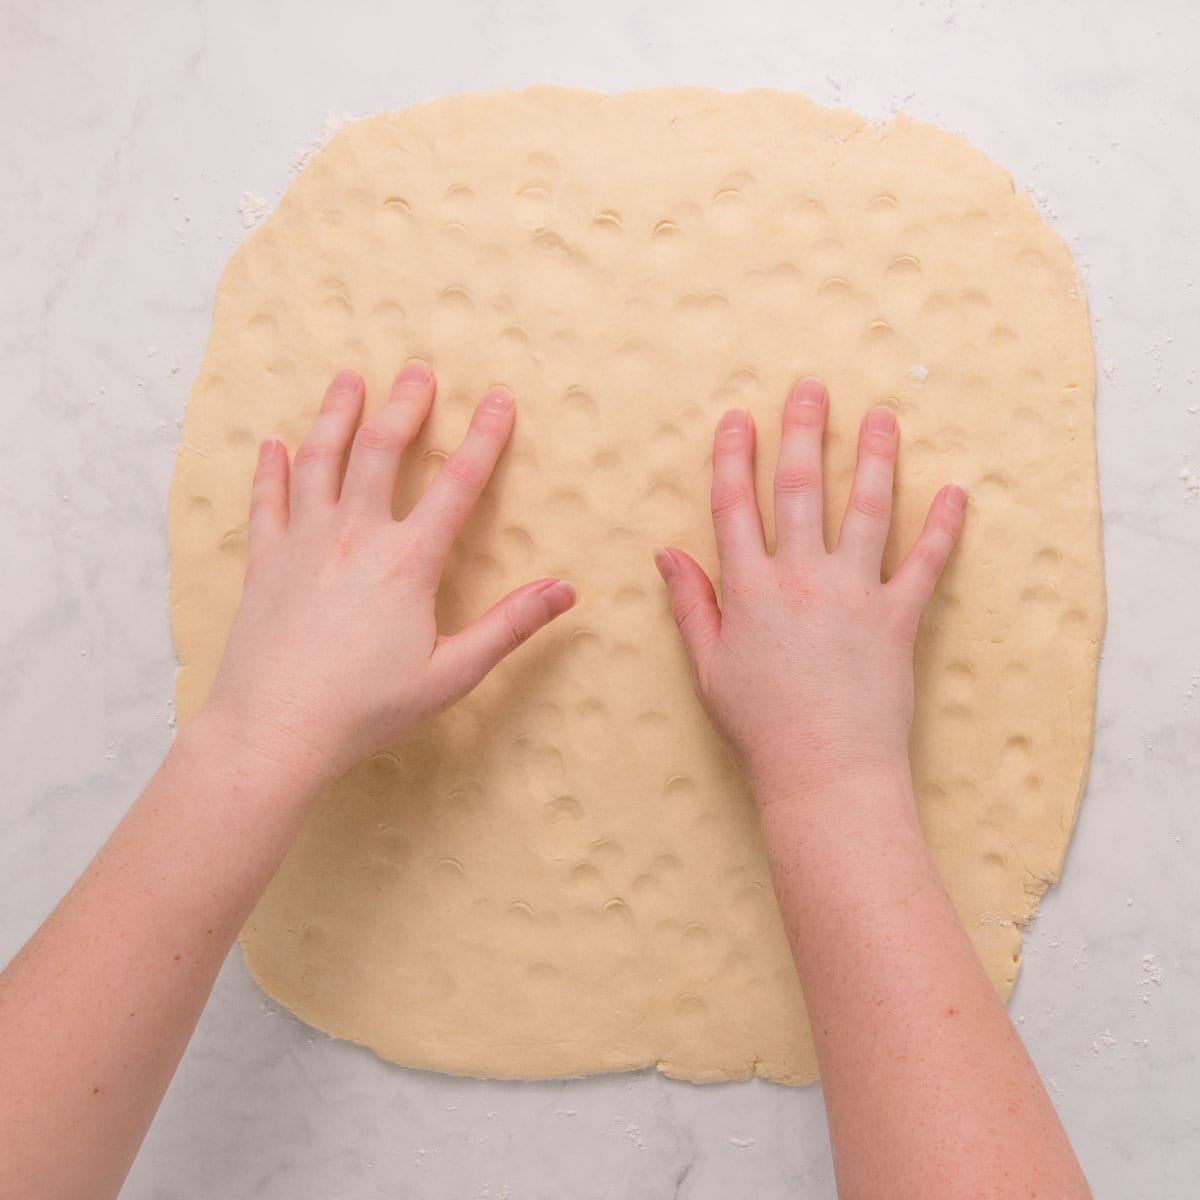
Lightly sprinkle the bench with flour, and pat or roll out the dough to around 35cm square. Make sure you gently lift it and check it’s not sticking to the bench, if it’s sticking, gently release it and then add a bit more flour underneath.
Dimple the surface of the dough by gently pressing it with your fingertips. This step is optional, but it makes these lovely little pockets that the sauce sits in, which helps hold it in so it doesn’t ooze out the bottom of the scroll in the oven.
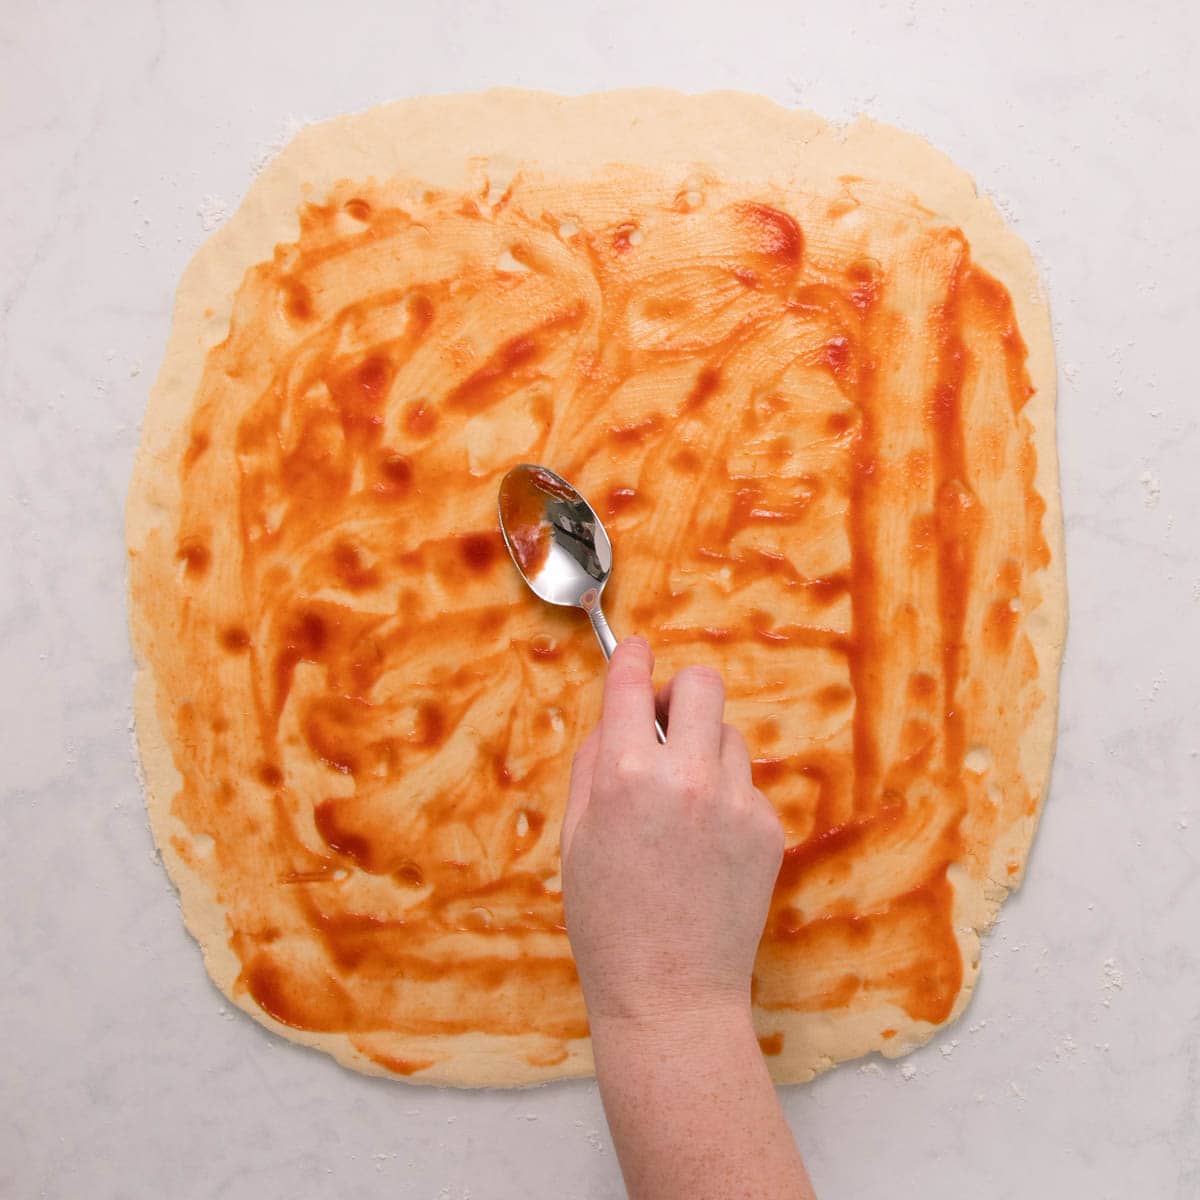
Spread your sauce over the surface, leaving a 2-3cm gap at the end opposite you, but going right up to the other three edges. Sprinkle with herbs or salt and pepper.
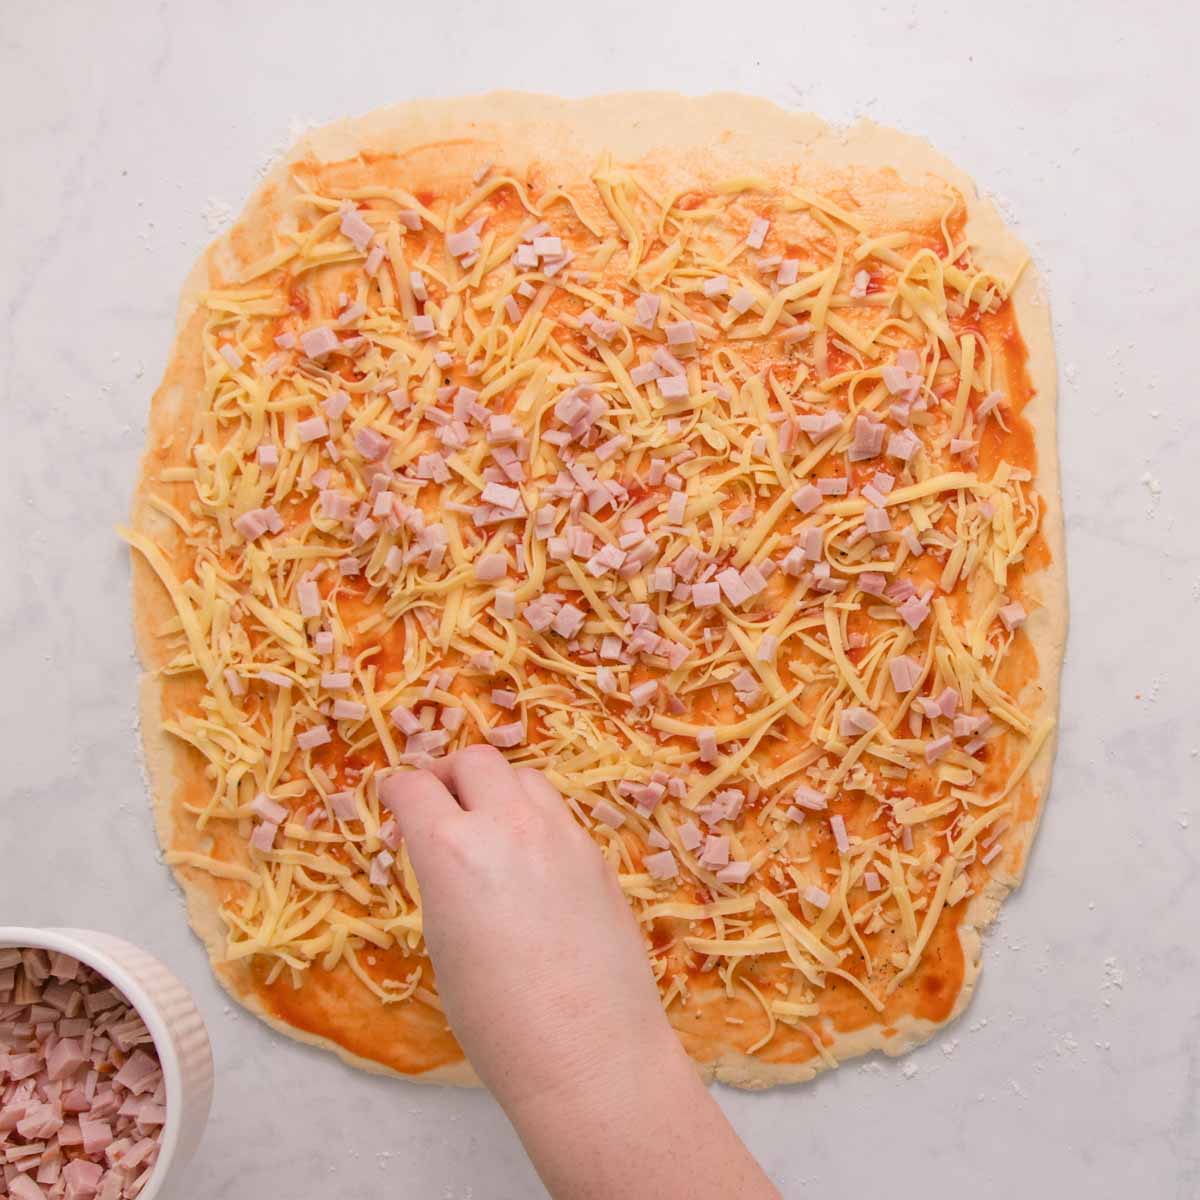
Sprinkle over the cheese/s in an even layer, then add your other toppings, again making sure to leave the strip bare on the opposite edge,
Now comes the fun bit – time to roll.
Starting at the edge closest to you, gently start to fold it over the toppings. Continue to roll, gently lifting the dough up so that it rolls over the topping (instead of pushing them out the other side!). Try to keep the roll tight, this will make it easier to cut later.
If you find that the dough is sticking to the bench at any point, don’t panic! Use a knife to spatula to gently loosen it, and continue to roll.
Conversely, if you find a lot of excess flour as you roll, gently dust it off so it doesn’t make your scrolls dry inside.
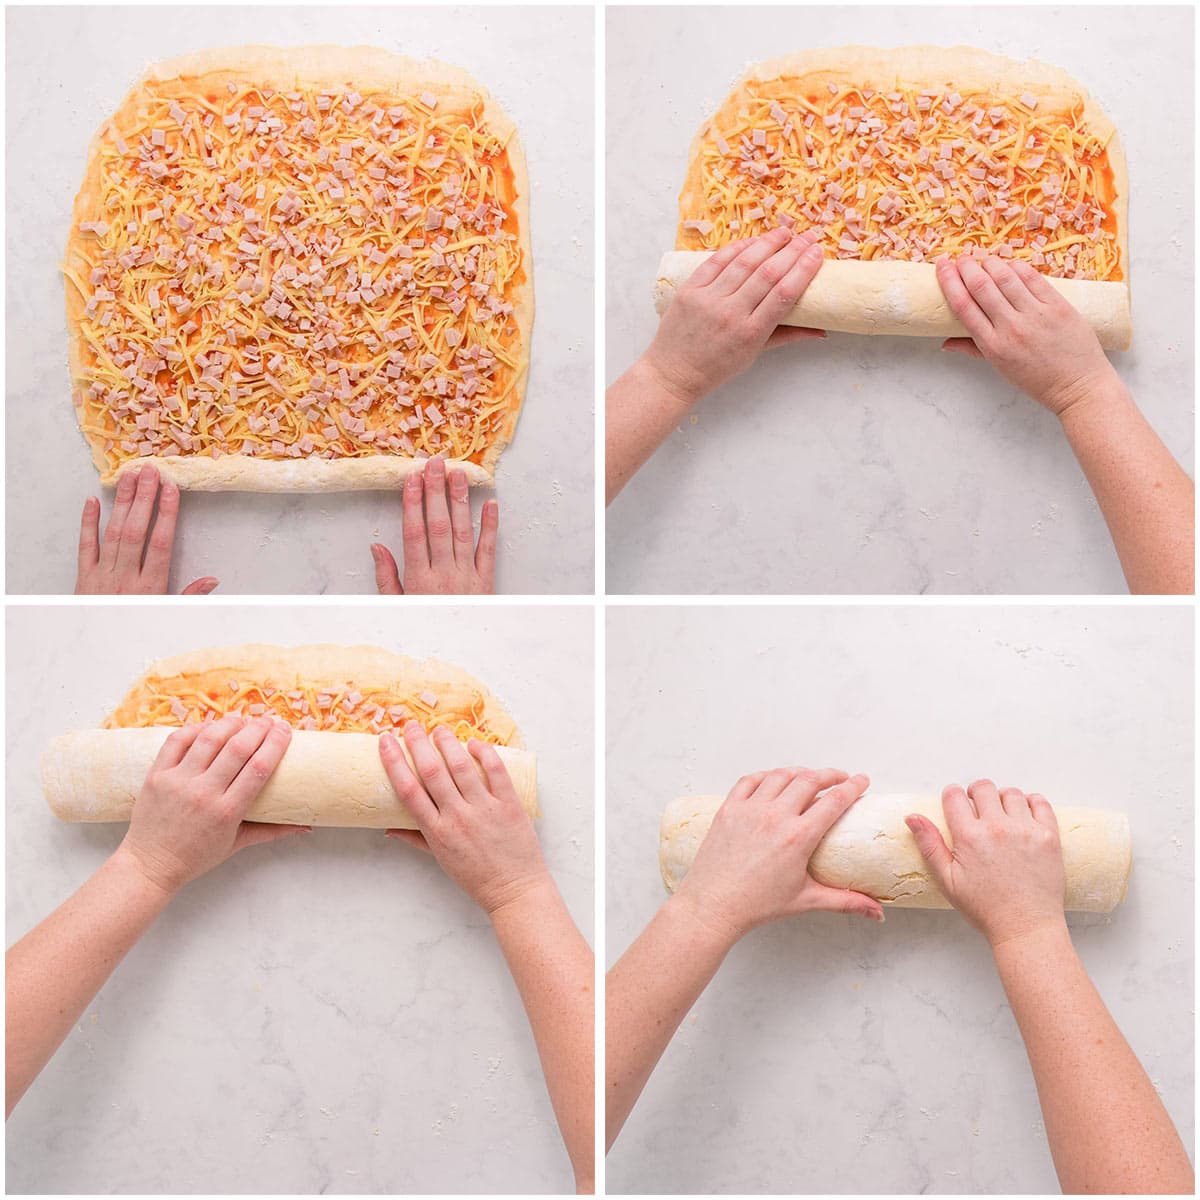
Once you’re almost at the other edge, lightly dampen the bare edge with a bit of water (or any of the cream/egg mixture left in the bottom of the jug) and then finish rolling, gently press the edge closed. Dust off any excess flour from the outside.
Cut the roll into 12 pieces. The easiest way to do this evenly is to cut the roll in half, then each piece in half again, then each of those quarters into three. If you want thicker scrolls you can cut the roll into fewer pieces, but you will need to adjust the baking time.
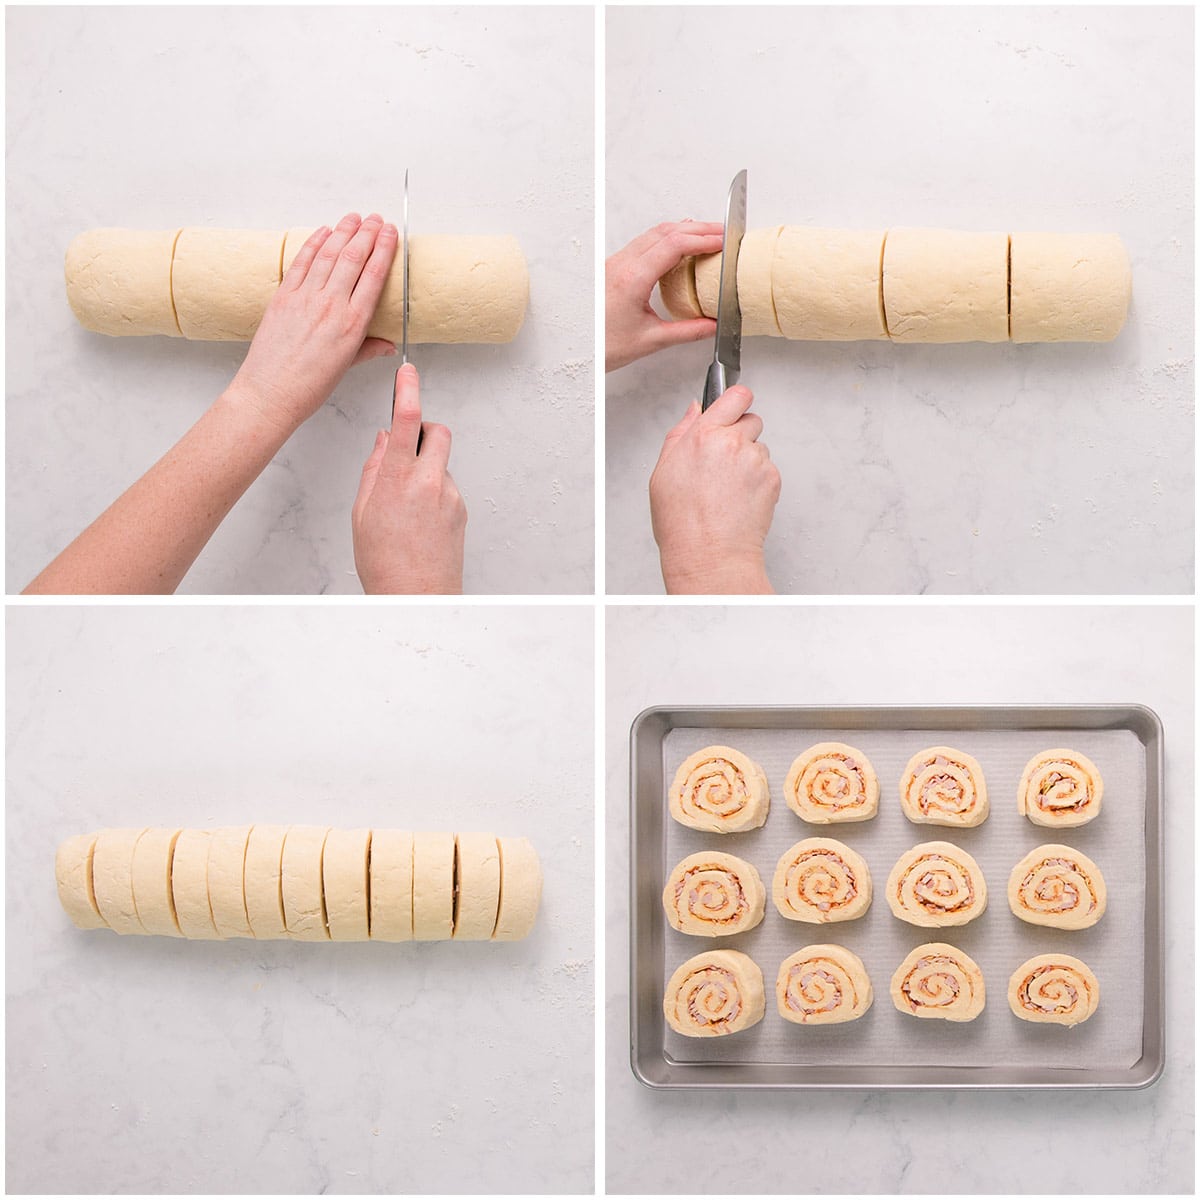
For scrolls with softer sides, place the pieces closer together on the tray, so they join up as they bake. For rounder, separate pinwheels, place them further apart as I did.
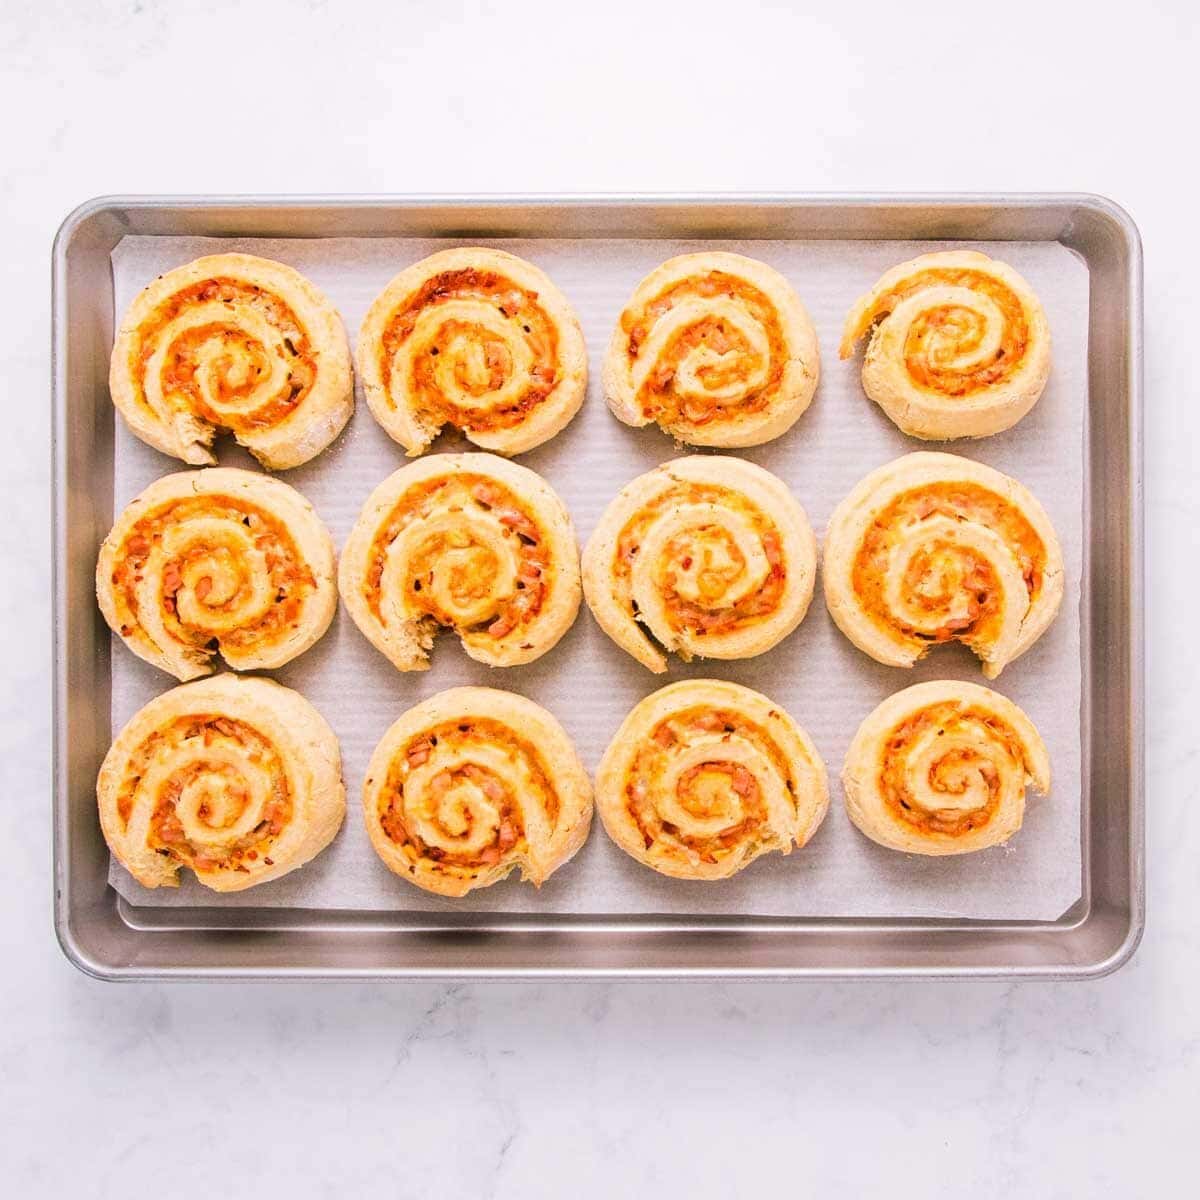
Bake until the swirly little babies are lightly golden, and the cheese is bubbling.
The gluten free pinwheels are at their best on the day of baking, but they will keep for a day in an airtight container. You can gently reheat them in the microwave to freshen them up.
Let me know your favourite pinwheel fillings in the comments below 💜
Enjoy!
PS: If you enjoy these, you might also want to give these gluten free cheese scones a try next 🧀
Are you new to gluten-free baking?
Or just need some tips on how to make the most of the recipes on GFKF? Check out my start guide to learn how to bake safely and successfully gluten free.
Allergen safety ✔️ Gluten free flour info ✔️
Accurate measuring ✔️ Tools + Equipment ✔️

Gluten Free Pinwheels (Savoury Scrolls)
Ingredients
For the dough
- 600 g gluten free flour, see notes
- 5 teaspoons baking powder
- 2 teaspoons xanthan gum, see notes
- 2 teaspoons sugar, (optional)
- ¼ teaspoon salt
- 500 mls cream
- 2 large eggs
Fillings (see notes for other options)
- 3 – 4 Tablespoons tomato sauce or tomato paste
- 150 g cheese,, grated (about 2 cups)
- 150 g ham,, chopped (about 1 cup)
- salt and pepper, optional
Instructions
- Heat oven to 200°C and line a large baking tray with baking paper.
- Prepare any fillings that need chopping or grating, and set aside.
- Place the gluten free flour, baking powder, xanthan gum, sugar and salt into a large mixing bowl, and give it a really good whisk to combine well.
- Whisk the eggs together with a fork in a jug or bowl, then whisk in the cream. Pour most of the egg/cream mixture into the dry ingredients, keeping back a few tablespoons.
- Mix it all together with a large spoon or stiff spatula. The dough should be soft and kind of shaggy looking. If it’s too dry, add the rest of the cream/egg mixture.Note: Because different gluten free flours absorb liquid differently, you may need to tweak the recipe to suit the flour you use. If the dough is still too dry, add a little more cream (or milk or water if you don’t have extra cream), a tablespoon at a time until the dough comes together. If it’s too wet, add a little sprinkle of extra flour.
- Give the dough a gentle knead on the bench, just until it comes together. It should look a little scraggly, but it should hold together. Pat the dough into a roughly square shape.
- Roll out the dough on a lightly floured bench to around 35cm square. Make sure you stop and gently lift it to check it’s not sticking to the bench. If it sticks, gently release it and then add a bit more flour underneath.
- Dimple the surface of the dough by gently pressing it with your fingertips – an optional step but it makes nice little pockets for the sauce.Spread the sauce over the dough, leaving a 2-3cm gap at the end opposite you, but going right up to the other three edges. Sprinkle with herbs or salt and pepper.
- Sprinkle over the cheese, and then the rest of your toppings.
- Starting at the edge closest to you, gently fold it over the toppings, then continue to roll, gently lifting the dough up so that it rolls over the topping (instead of pushing it all out the other side!). Try to keep the roll tight, this will make it easier to cut later.If you find that the dough is sticking to the bench at any point, use a knife or spatula to gently loosen it, and continue to roll. Conversely, if you find a lot of excess flour as you roll, gently dust it off so it doesn’t make your scrolls dry inside.
- Once you’re almost at the other edge, dampen the bare edge with a bit of water (or any of the cream/egg mixture left in the bottom of the jug) then roll to the end, gently pressing the edge closed.
- Cut the roll into 12 pieces. The easiest way to do this evenly is to cut the roll in half, then each piece in half again, then each of those quarters into three. For thicker scrolls, you can cut the roll into fewer pieces, but you will need to bake them for longer.
- Arrange the pieces on the prepared baking tray and bake for 20-25 minutes, or until lightly golden and the cheese is bubbling.
- The pinwheels are at their best the day of baking, but leftovers can be stored in an airtight container and reheated gently in the microwave the next day.
Notes
More Gluten Free Recipe You May Like…
My first attempt and they are amazing. Such a nice texture. I didn’t have xanthum gum so substituted for 4 tsp of psyllium husk made into a paste and it worked perfectly!
Hi Michelle! Oh that’s great to hear, I’m glad you enjoyed them. And it’s very helpful to know that it worked with psyllium husk instead of xanthan gum. Thank you!
They were a bit dry but it is gluten free so I’m not surprised. Overall they are delicious and look edible instead of plastic like most gluten free foods. I’m probably going to use them for my school lunches. (My mum likes the scrolls too) Thanks!!!